This week I started off with training yet another LoRA model for another base model, segmind/SSD-1B.
I was excited to see how the model would perform, considering it is based on SDXL, not as tiny-sd and small-sd based on the older SD-1.5.
My experience with SDXL has been quite positive so far, so I was looking forward to seeing how the model would perform.
Here you can see some images generated with SDXL, generated with one of my telegram bots
And some more examples without prompt
Now with this experience in mind, I started training the LoRA model. I used the same settings as before, just using a different base model.
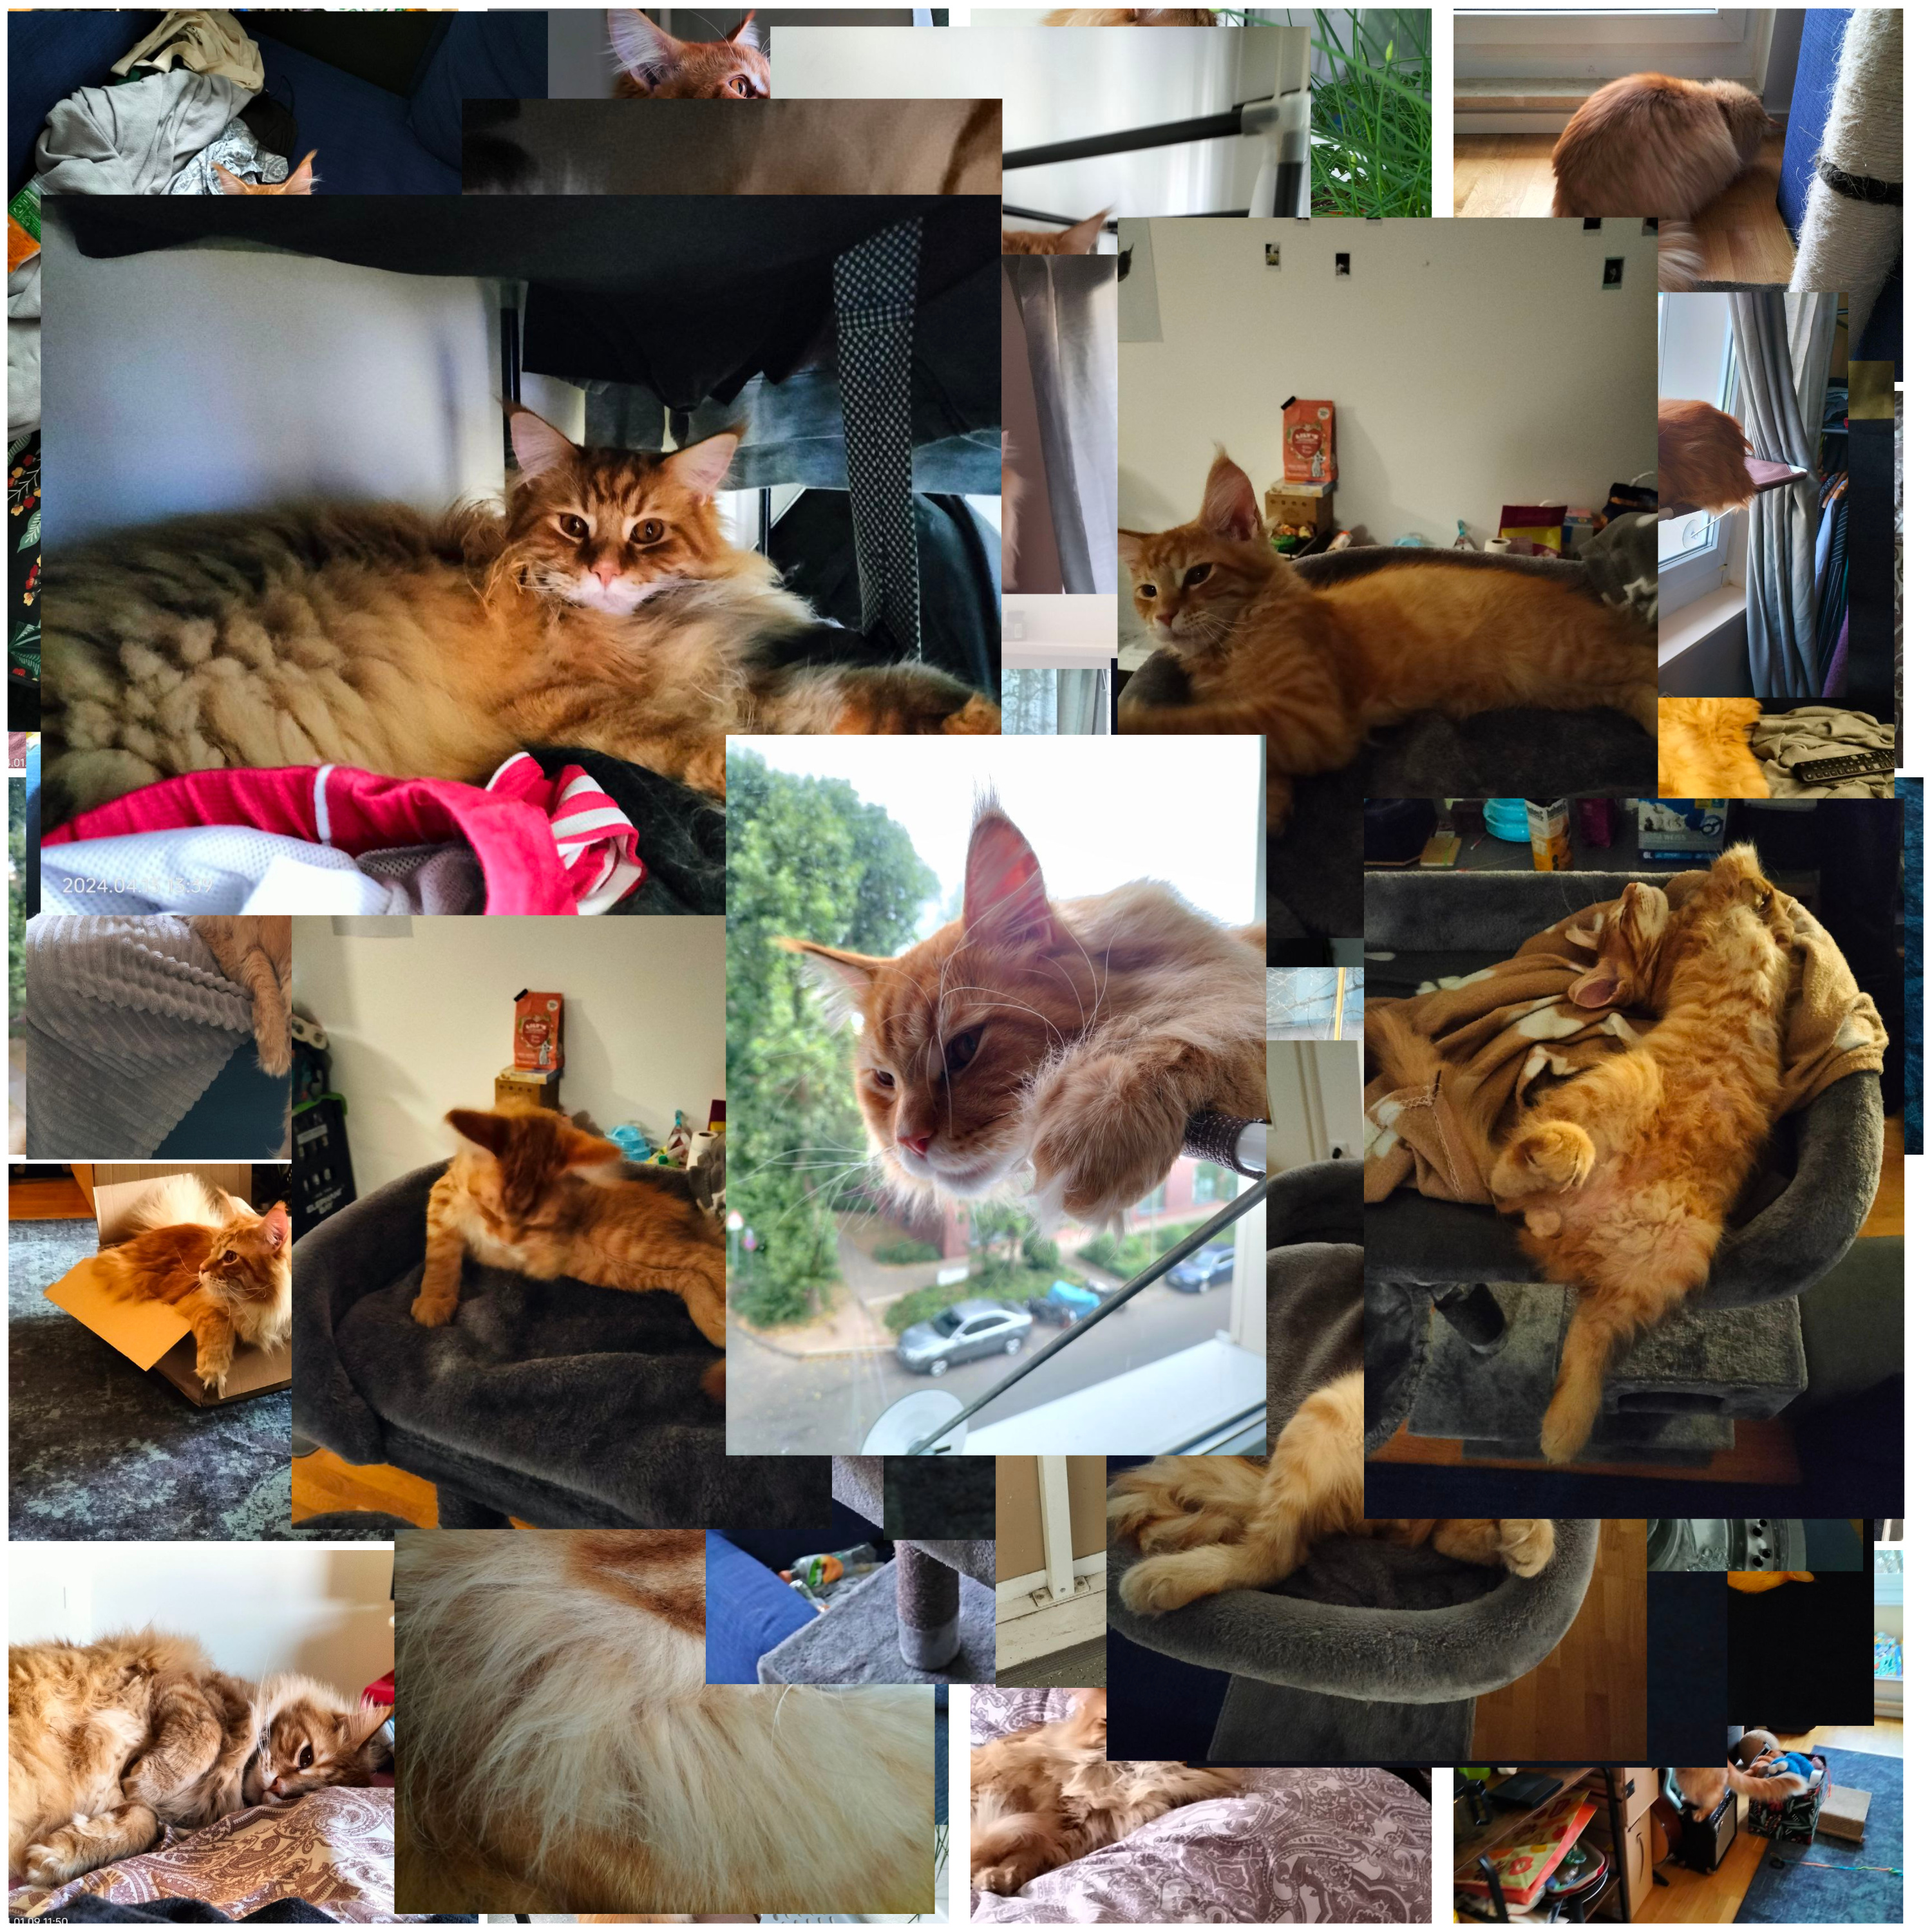
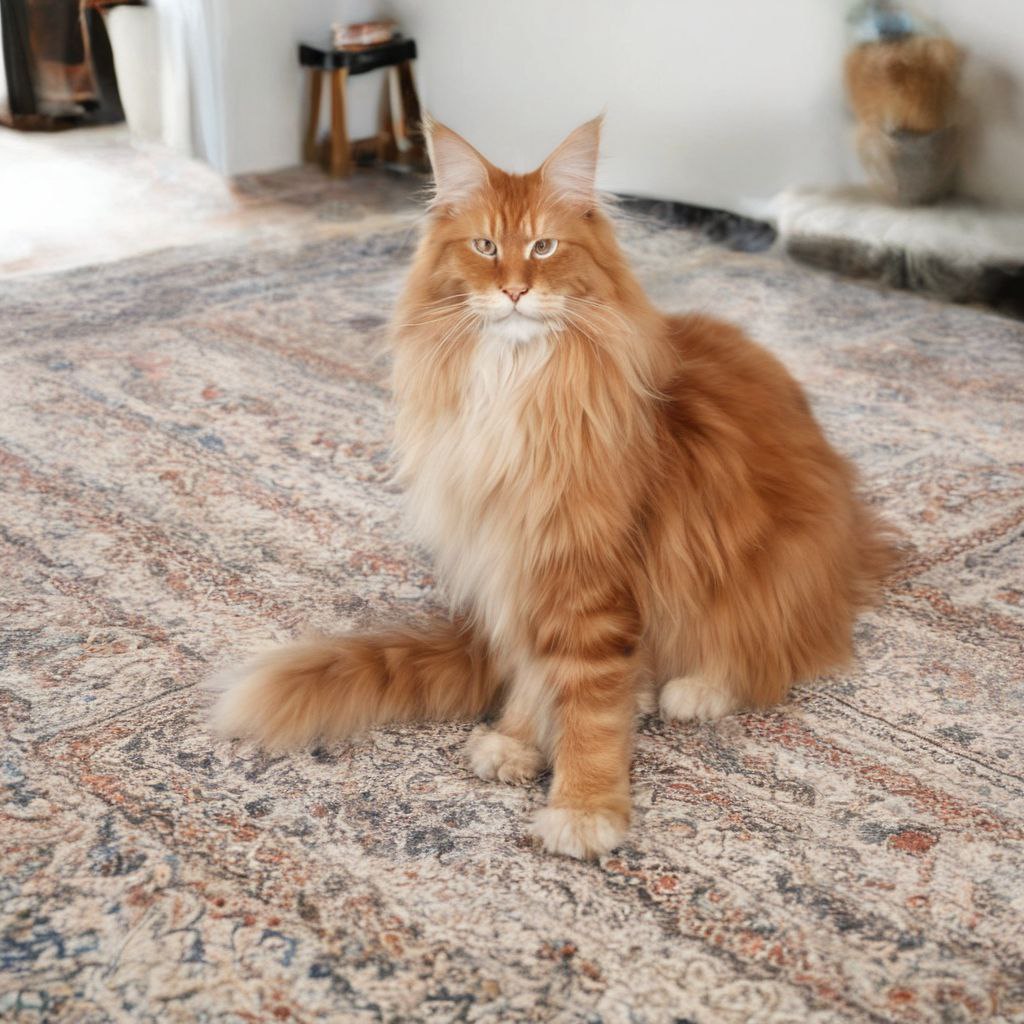
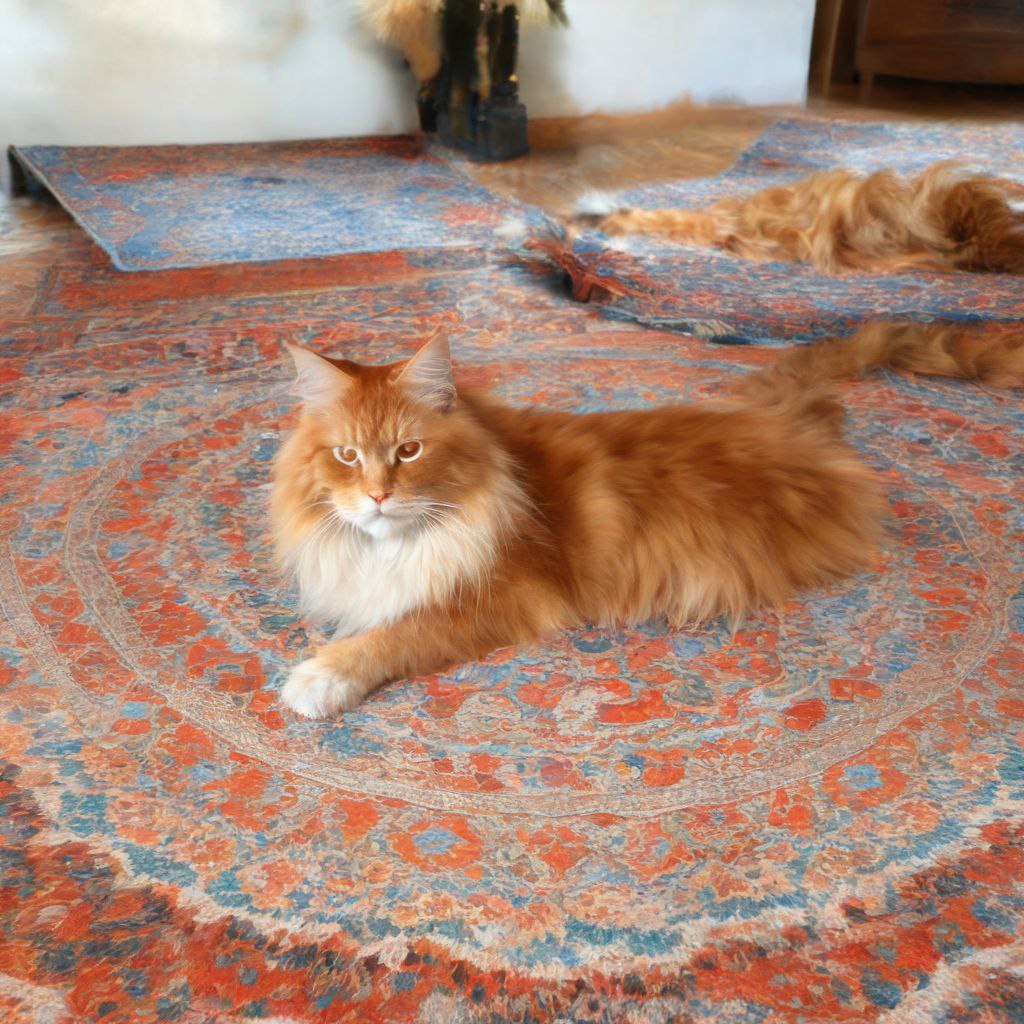
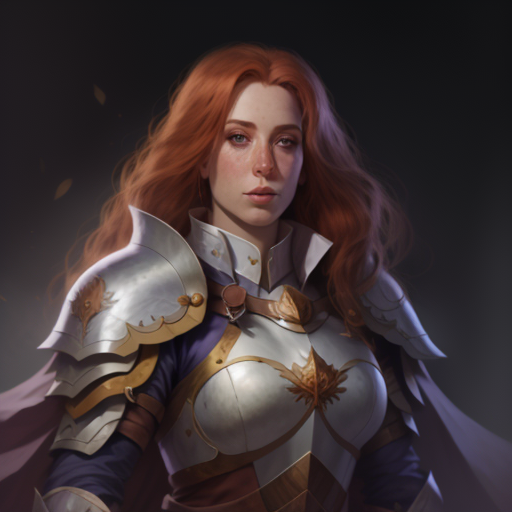
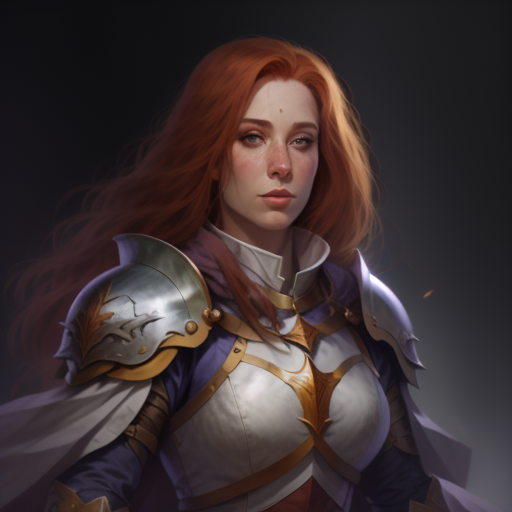
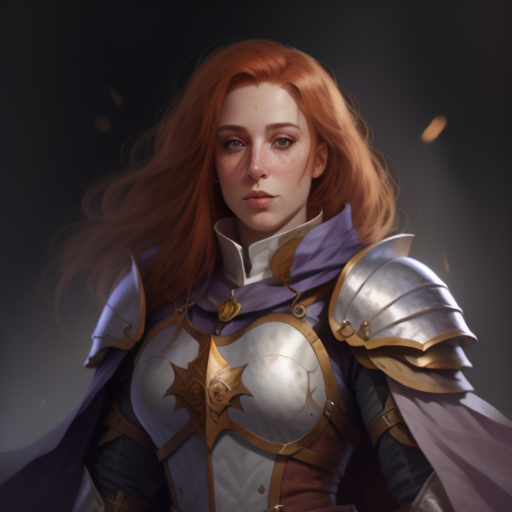
The result was actually quite good. This time I trained it based on 50 images of my cat
The final LoRA model is available here you can use it with the inference API.
But I would recommend to not use the inference UI, as this model heavily requires a negative prompt to generate good images.
Here are some examples:
The next big thing on my mental To-do list for image generation was ControlNet a rather novel approach to control diffusion models. But before I took a deep dive I wanted to explore one more thing, similar to ControlNet.
I'm talking about IP-Adapter.
The last LoRA?
Well, well, well... I don't know where to start.
So after setting up everything, which means installing dependencies, downloading some dubious binaries from a huggingface 🤗 repo and patching all things together, I got pretty shocking results.
The first thing I've looked into was IP-Adapter-FaceID-Portrait, according to the code repository
IP-Adapter-FaceID-Portrait: same with IP-Adapter-FaceID but for portrait generation (no lora! no controlnet!). Specifically, it accepts multiple facial images to enhance similarity (the default is 5).
Perfect, exactly what I was looking for. I wanted to generate images of Margot Robbie in a black dress. So I went to google images, spent 2 minutes collecting a bunch of nice looking portraits of her and started the inference.
Input images:
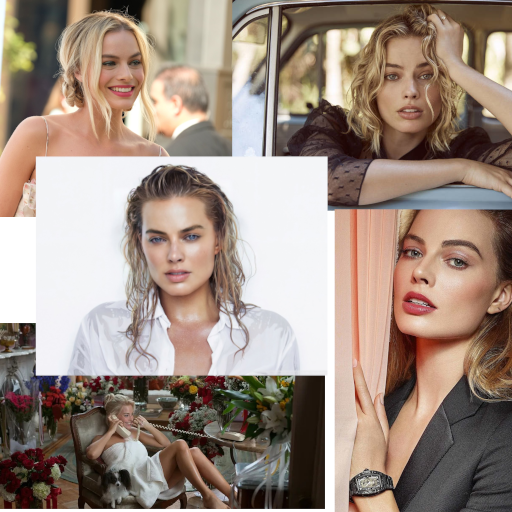
Once the features of these portraits are extracted, I can use them to generate new images of Margot Robbie in different situations.
For instance I could generate some images of her in a black dress. I used this example, because it makes the application quite obvious. We didn't include any picture of her in a black dress, so the model doesn't have any information about how she looks in different clothing. But it should be able to generate a picture of her in any kind of dress, in any color and any situation, based on the other images.
Prompt:
professional photoshoot full body portrait of a woman in a short black dressNegative Prompt:monochrome, lowres, bad anatomy, worst quality, low quality, blurry
Generated output:
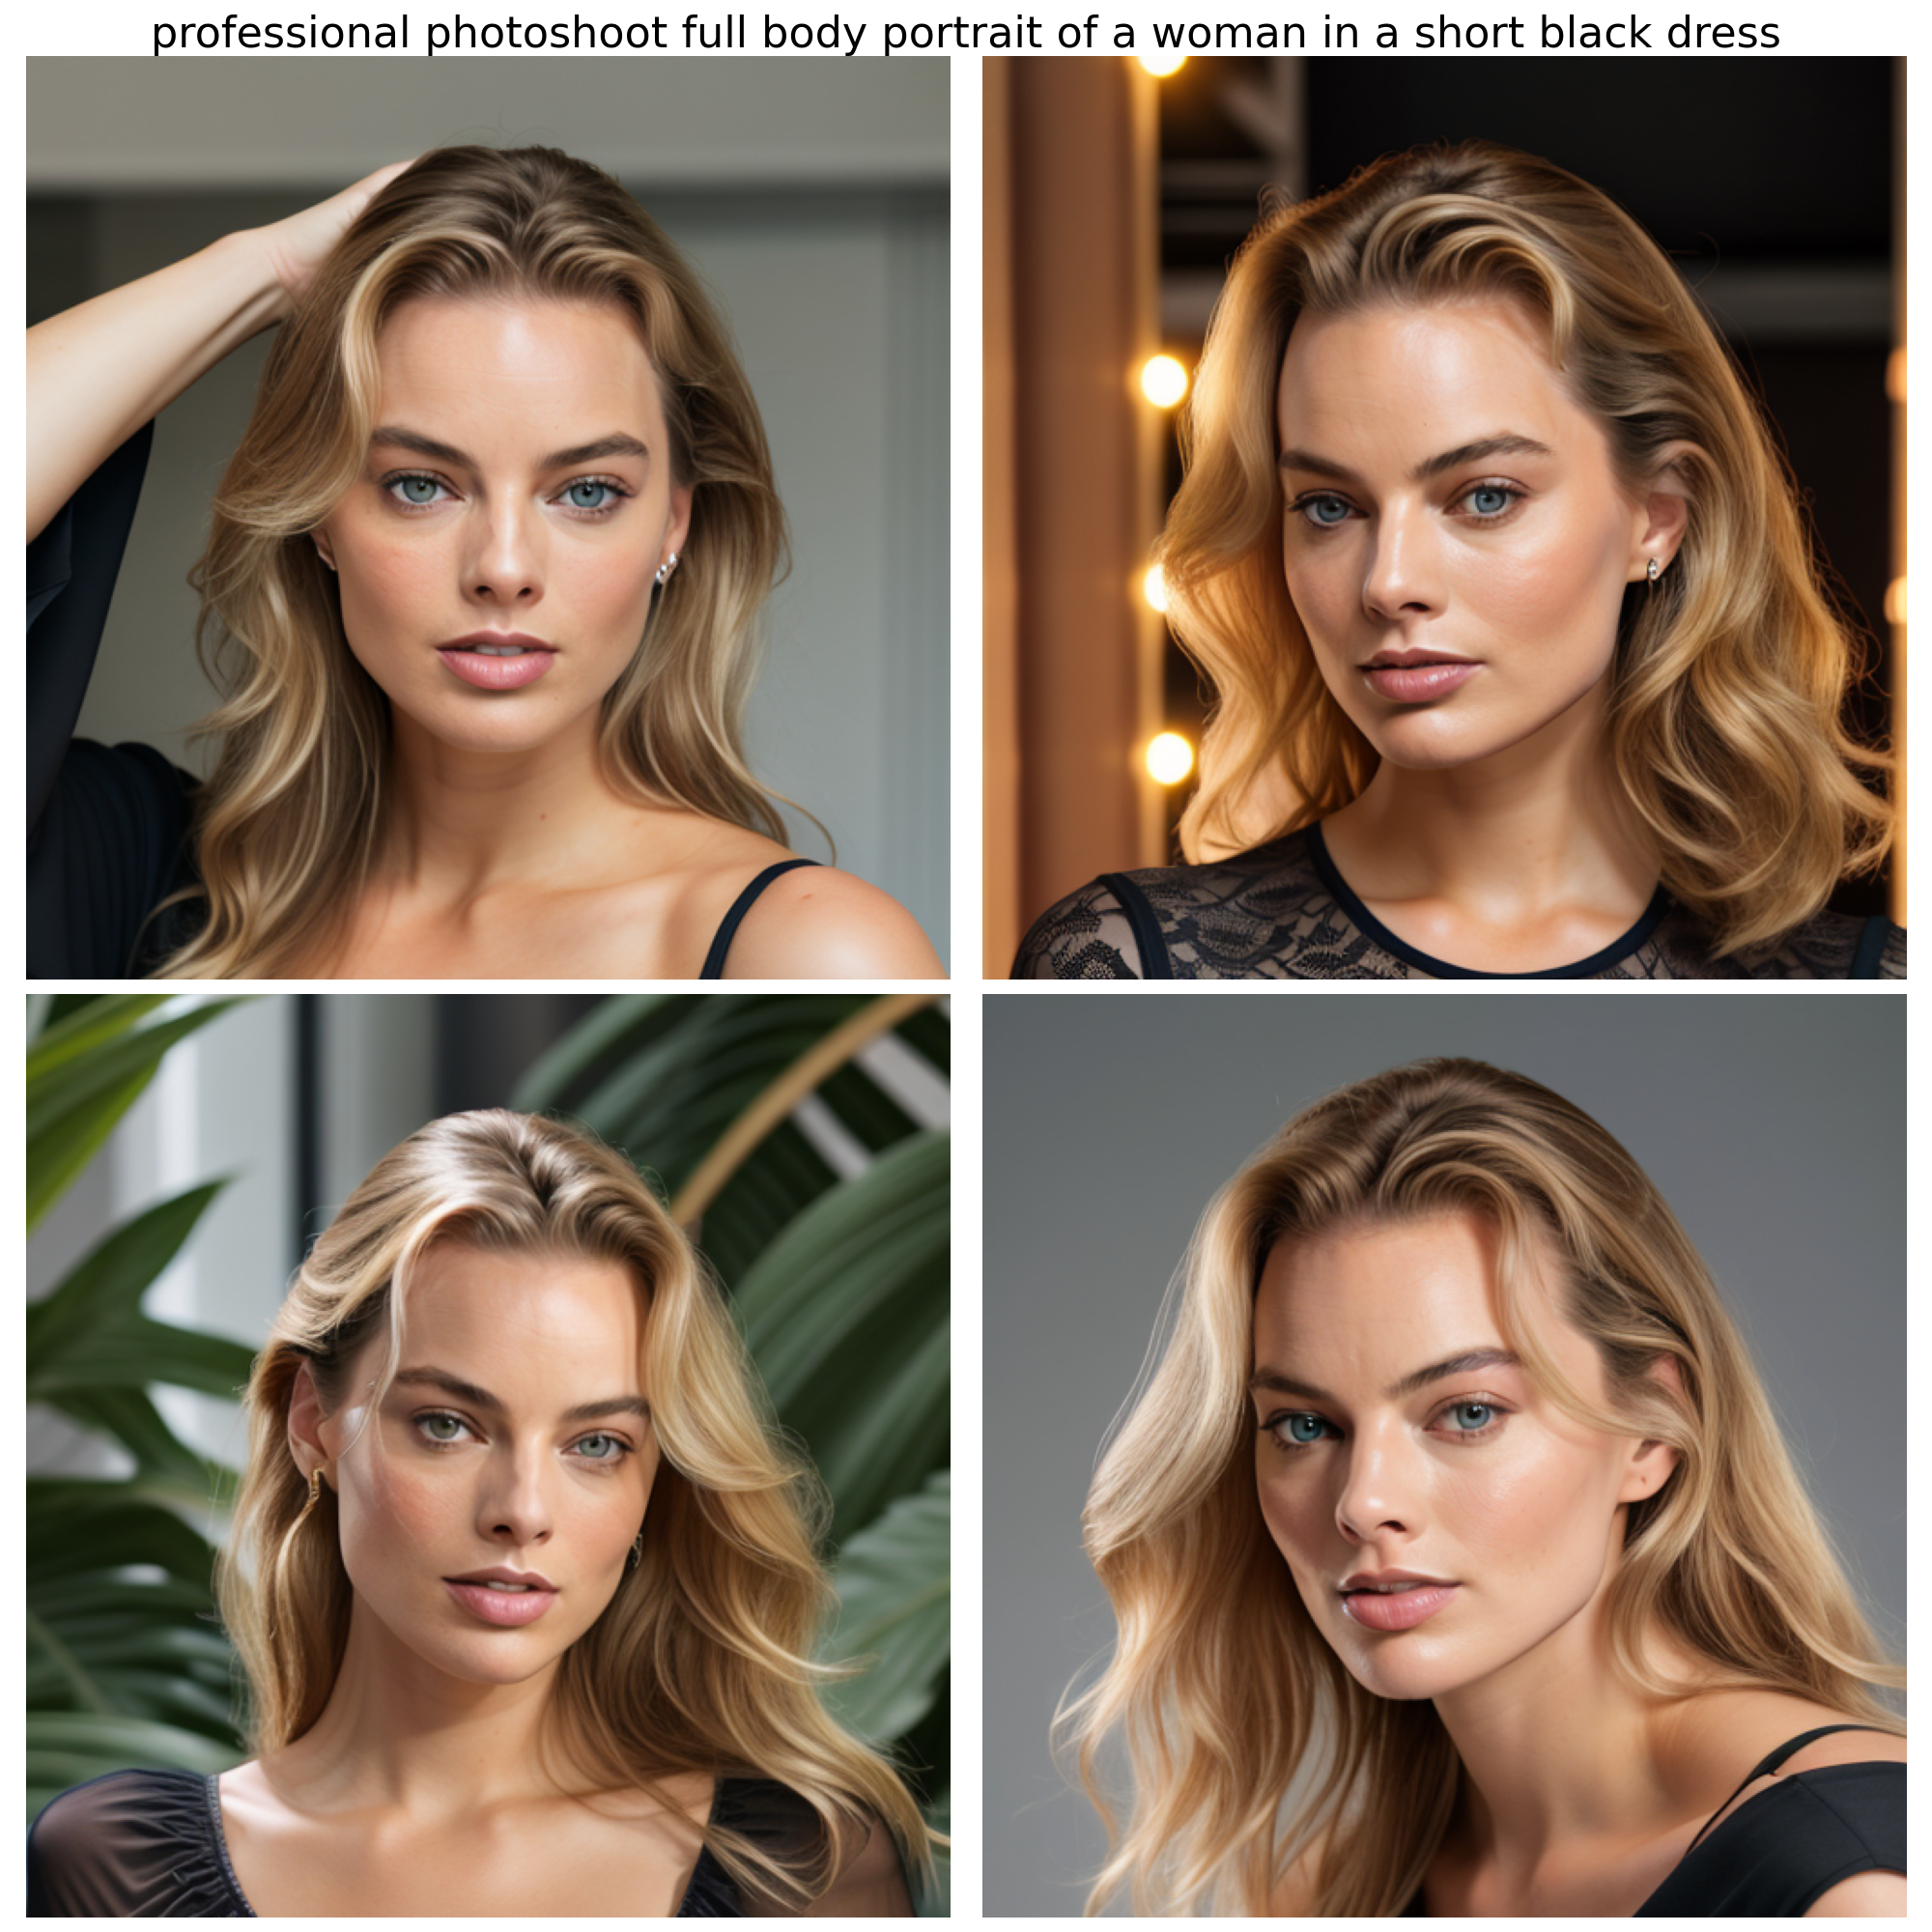
Frankly, I was shocked by these results. How could it be so easy to finally have control over a very specific aspect of the resulting image?
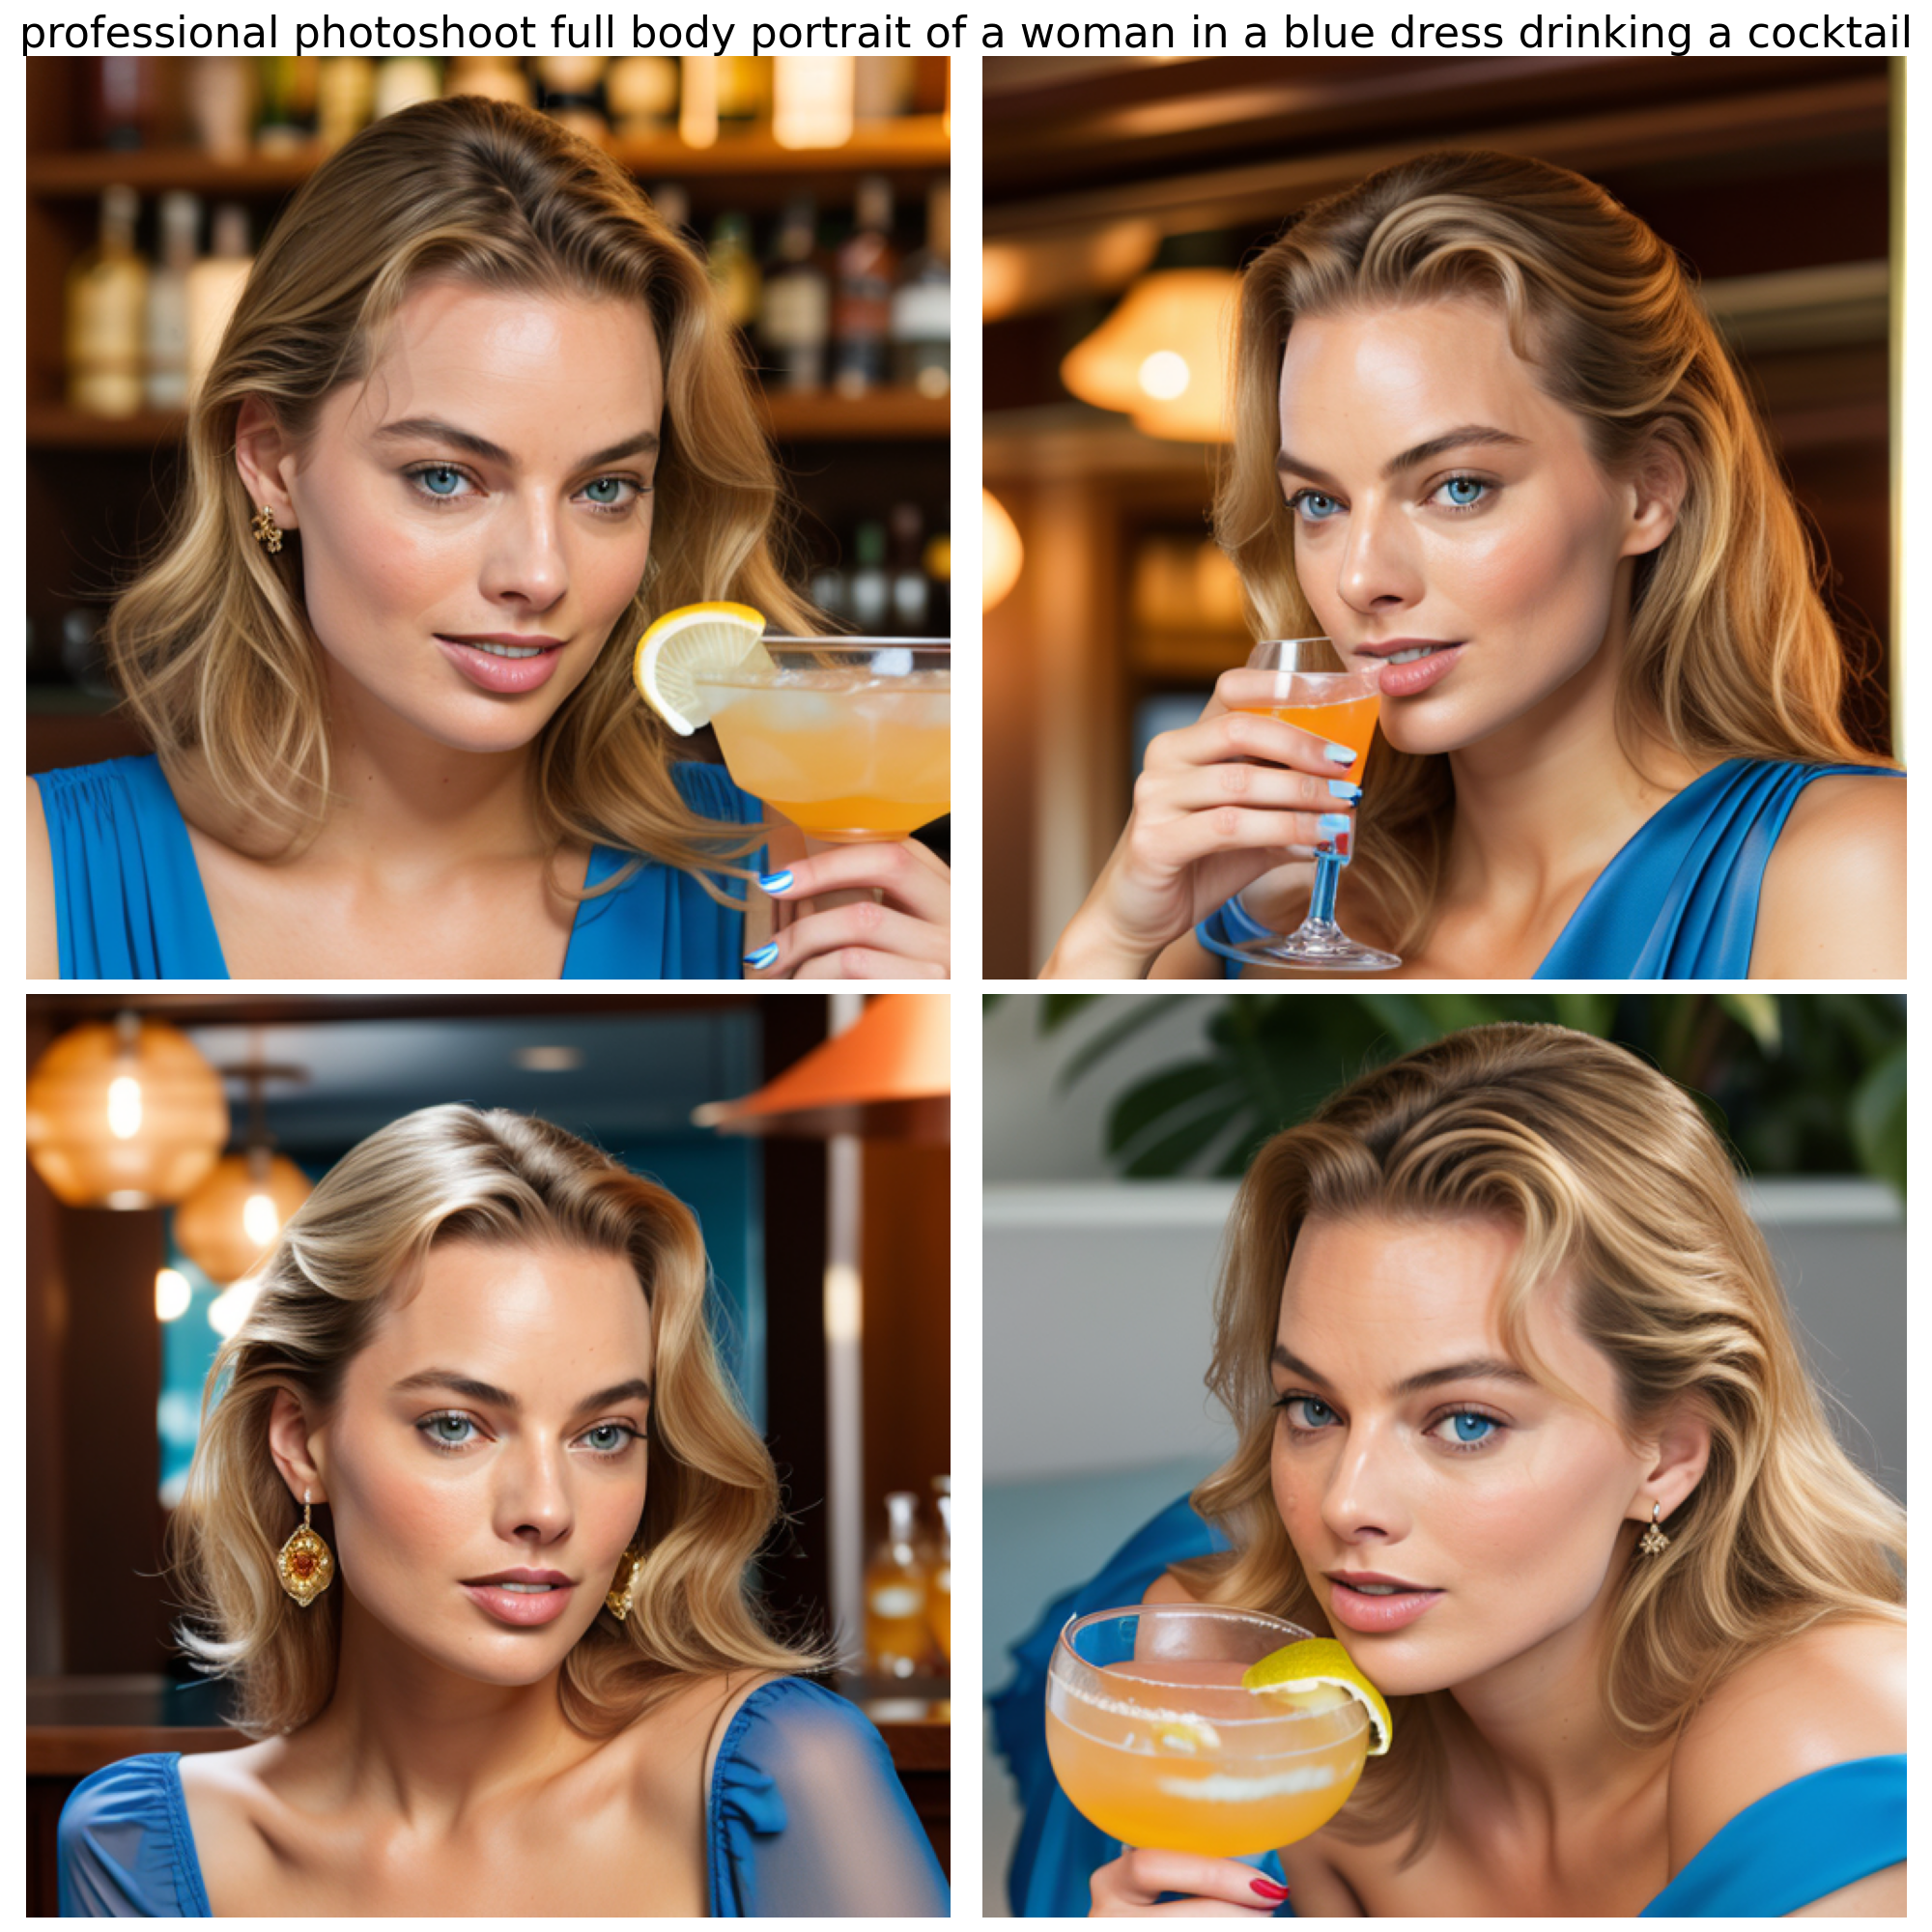
Here's another example, this time Margot is wearing a blue dress and drinks a cocktail.
Prompt:
professional photoshoot full body portrait of a woman in a blue dress drinking a cocktail
Negative Prompt:monochrome, lowres, bad anatomy, worst quality, low quality, blurry
Immediately I started to think about the implications of this. And especially about the potential of this technology in the wrong hands.
Regardless, and for the sake of science, I continued to experiment with this model and will describe my setup in the next section. We will also look into other variants of the IP-Adapter and see how they perform and explore potential use cases.
The Setup
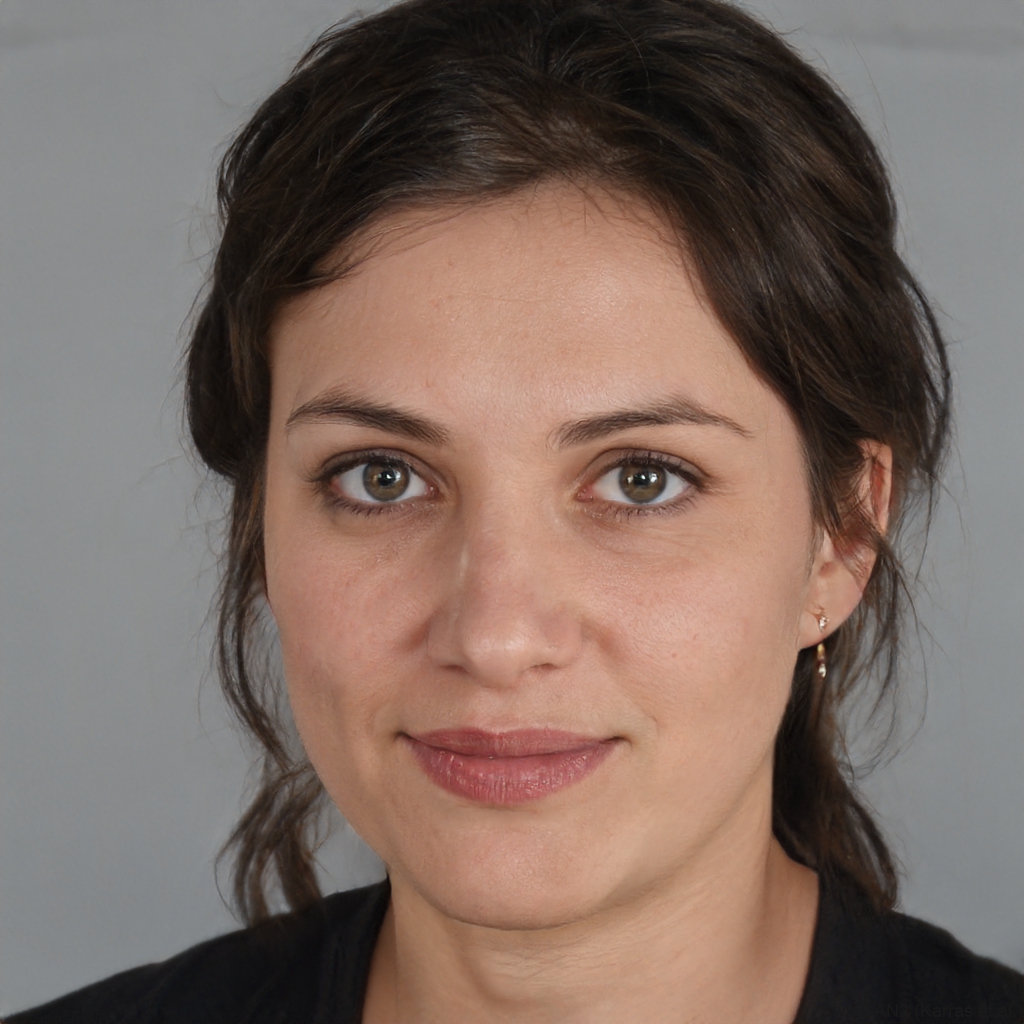
I ran some more experiments, this time with the face of a non-existing person from thispersondoesnotexist.com.
Here I will explain it in a step-by-step guide.
In the future you'll be able to find a simplified solution for the usage of these workflows in one of my repositories. Simply head over to my repo philipp-zettl/factory where you will find a web-api that handles the most common use cases.
Before we get started, please note that you need to have a GPU with at least 5GB of VRAM. I used a 4070 (8GB) for this experiment. Otherwise it will take ages to generate the images. You can still run everything on a CPU, but it will be very slow and require significantly more RAM, than the GPU variant.
This is due to the fact that the most obvious optimization method of quantization via reduction of the float point precision of the model weights can not be executed on CPUs.
In other words, CPU's can't handle float16 operations, which are a crucial optimization method to reduce the memory footprint of models. They can only run float32 based models, which require more or less float16.
With that being said we can start our journey.
Initially, I had to install the dependencies, which are not listed, but by trial and error I found out that I needed to install the following packages:
pip install opencv-python insightface onnxruntime ip-adapterv einops torch torchvision diffusers PillowNow due to the fact that we only have 1 image of our protagonist, we need to generate a few more.
We can do this by using the IP-Adapter-FaceID-Portrait model. This model is specifically designed to generate images of a person based on a single image.
There are two more files we need to optain from a huggingface 🤗 repo. Download them and put them into your project directory
To use this model, we first need to extract features from our image. This can be done by running the following code:
import cv2
from insightface.app import FaceAnalysis
from insightface.utils import face_align
import torch
app = FaceAnalysis(name="buffalo_l", providers=['CUDAExecutionProvider', 'CPUExecutionProvider'])
app.prepare(ctx_id=0, det_size=(640, 640))
image = cv2.imread("thispersondoesnotexist.jpg")
faces = app.get(image)
faceid_embeds = torch.from_numpy(faces[0].normed_embedding).unsqueeze(0)
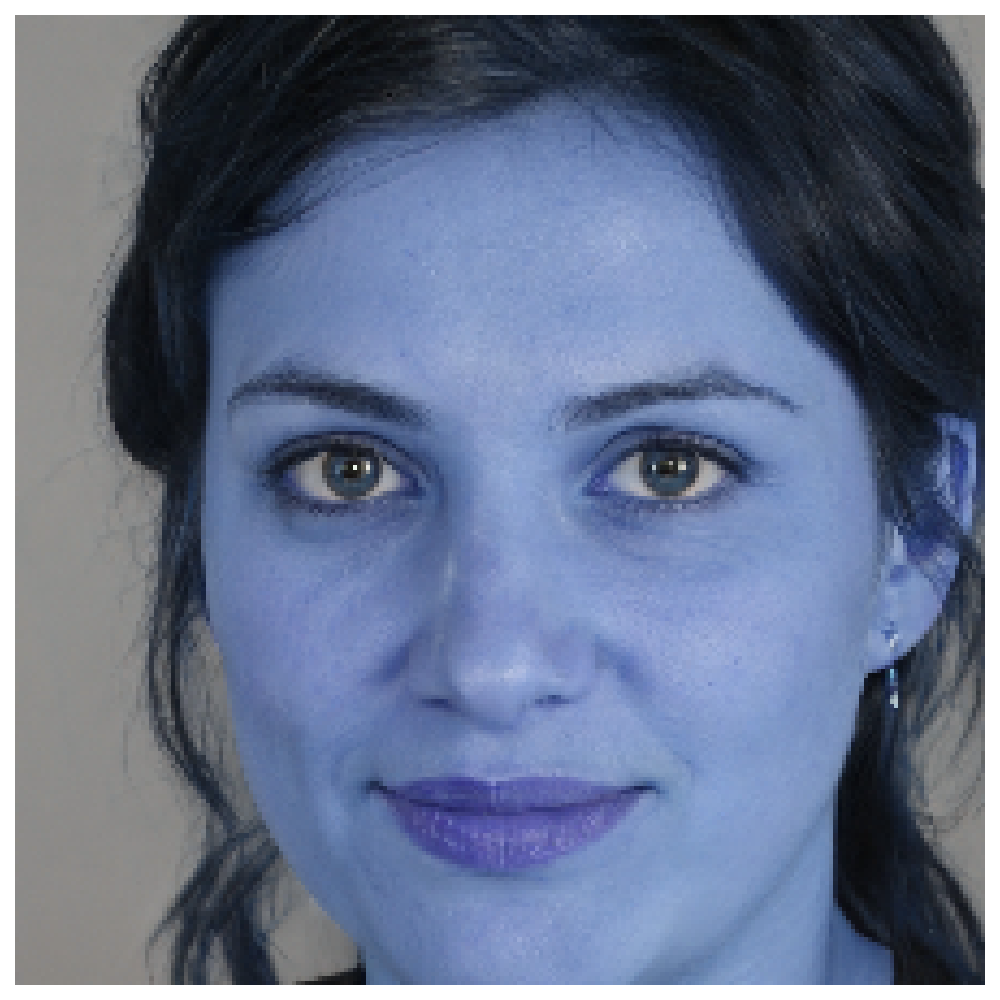
face_image = face_align.norm_crop(image, landmark=faces[0].kps, image_size=224) # you can also segment the faceThis doesn't change the input image much, we can look at face_image to see the cropped face.
 Next, we need to build the pipeline to generate new images out of the
 face_image and the faceid_embeds.
import torch
from diffusers import StableDiffusionPipeline, DDIMScheduler, AutoencoderKL
from PIL import Image

from ip_adapter.ip_adapter_faceid import IPAdapterFaceIDPlus

v2 = True
base_model_path = "SG161222/Realistic_Vision_V4.0_noVAE"
vae_model_path = "stabilityai/sd-vae-ft-mse"
image_encoder_path = "laion/CLIP-ViT-H-14-laion2B-s32B-b79K"
ip_ckpt = "ip-adapter-faceid-plusv2_sd15.bin"
device = "cuda"

noise_scheduler = DDIMScheduler(
    num_train_timesteps=1000,
    beta_start=0.00085,
    beta_end=0.012,
    beta_schedule="scaled_linear",
    clip_sample=False,
    set_alpha_to_one=False,
    steps_offset=1,
)
vae = AutoencoderKL.from_pretrained(vae_model_path).to(dtype=torch.float16)
pipe = StableDiffusionPipeline.from_pretrained(
    base_model_path,
    torch_dtype=torch.float16,
    scheduler=noise_scheduler,
    vae=vae,
    feature_extractor=None,
    safety_checker=None
)

# load ip-adapter
ip_model = IPAdapterFaceIDPlus(pipe, image_encoder_path, ip_ckpt, device)
As you can see, we're using a fine-tuned variant of SD 1.5, called Realistic_Vision_V4.0_noVAE as our base model.
This model ships without a VAE, therefore we need to get a separate one. As suggested by the IP-Adapter authors, we're using stabilityai/sd-vae-ft-mse. This VAE is fine tuned on SFW images of humans to improve the reconstruction of faces^1.
To process the incoming face image, IP-Adapter is using the CLIP model laion/CLIP-ViT-H-14-laion2B-s32B-b79K. Which generates embeddings.
Apart from this, we also need to use a noise scheduler, which is a DDIMScheduler with a beta schedule. This is used to control the amount of noise added to the image during the diffusion process.
You can find a diagram of the pipeline here:

Once we have the pipeline set up, we can generate new images by running the following code:
# generate image
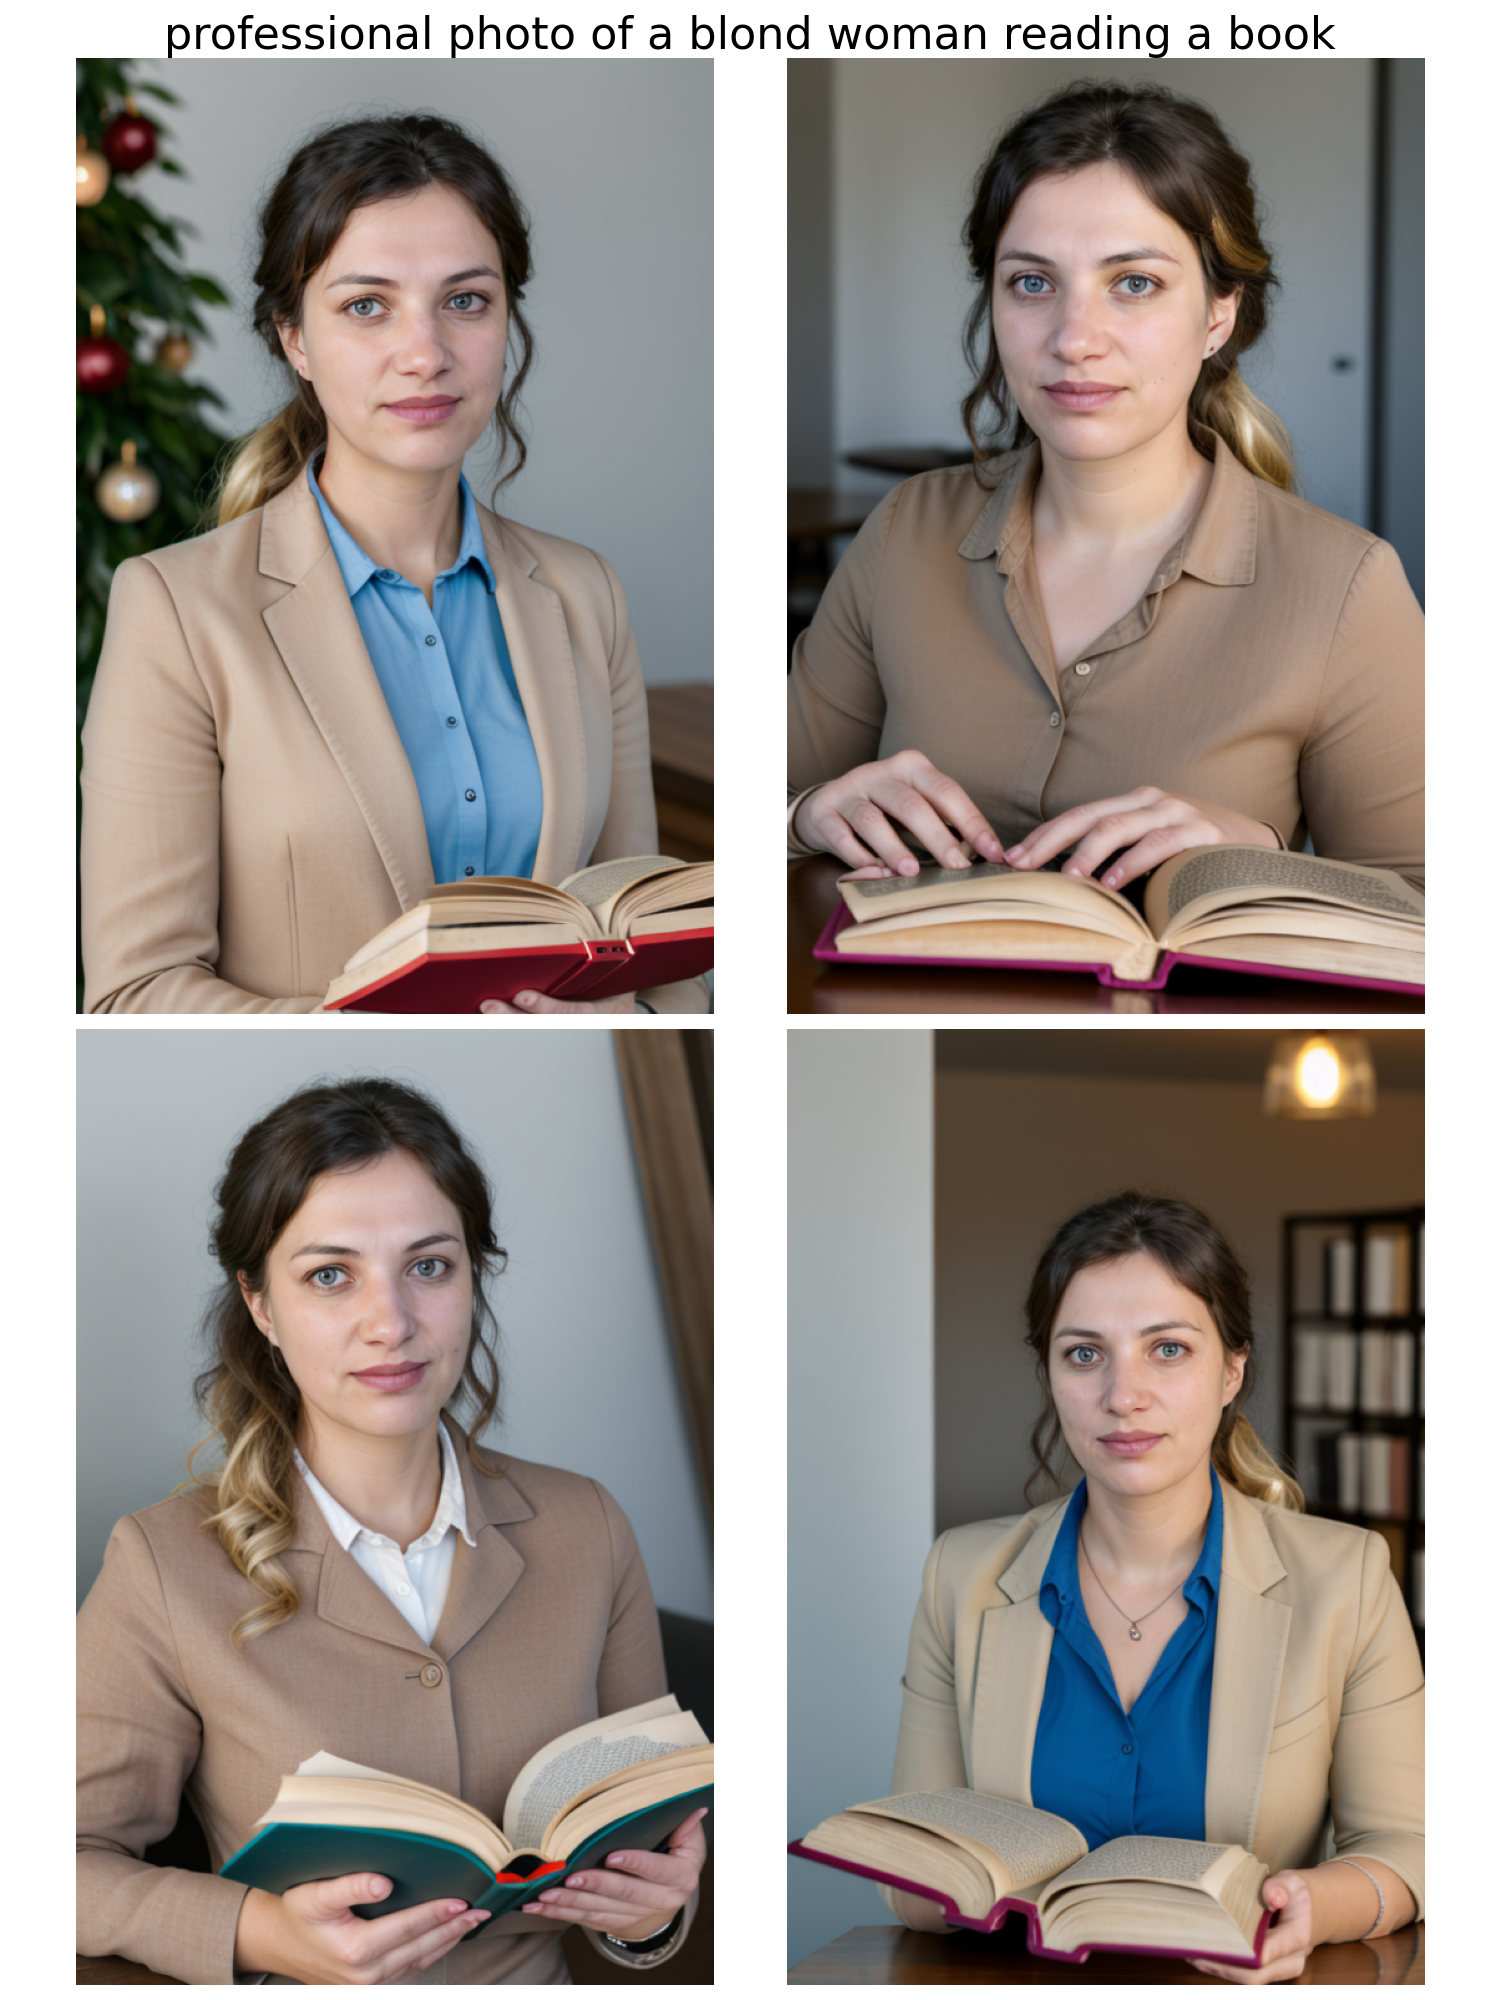
prompt = "professional photo of a woman reading a book"
negative_prompt = "monochrome, lowres, bad anatomy, worst quality, low quality, blurry"
images = ip_model.generate(
prompt=prompt,
negative_prompt=negative_prompt,
face_image=face_image,
faceid_embeds=faceid_embeds,
shortcut=v2,
s_scale=1.0,
num_samples=4,
width=512,
height=768,
num_inference_steps=35,
seed=2024
)which yields
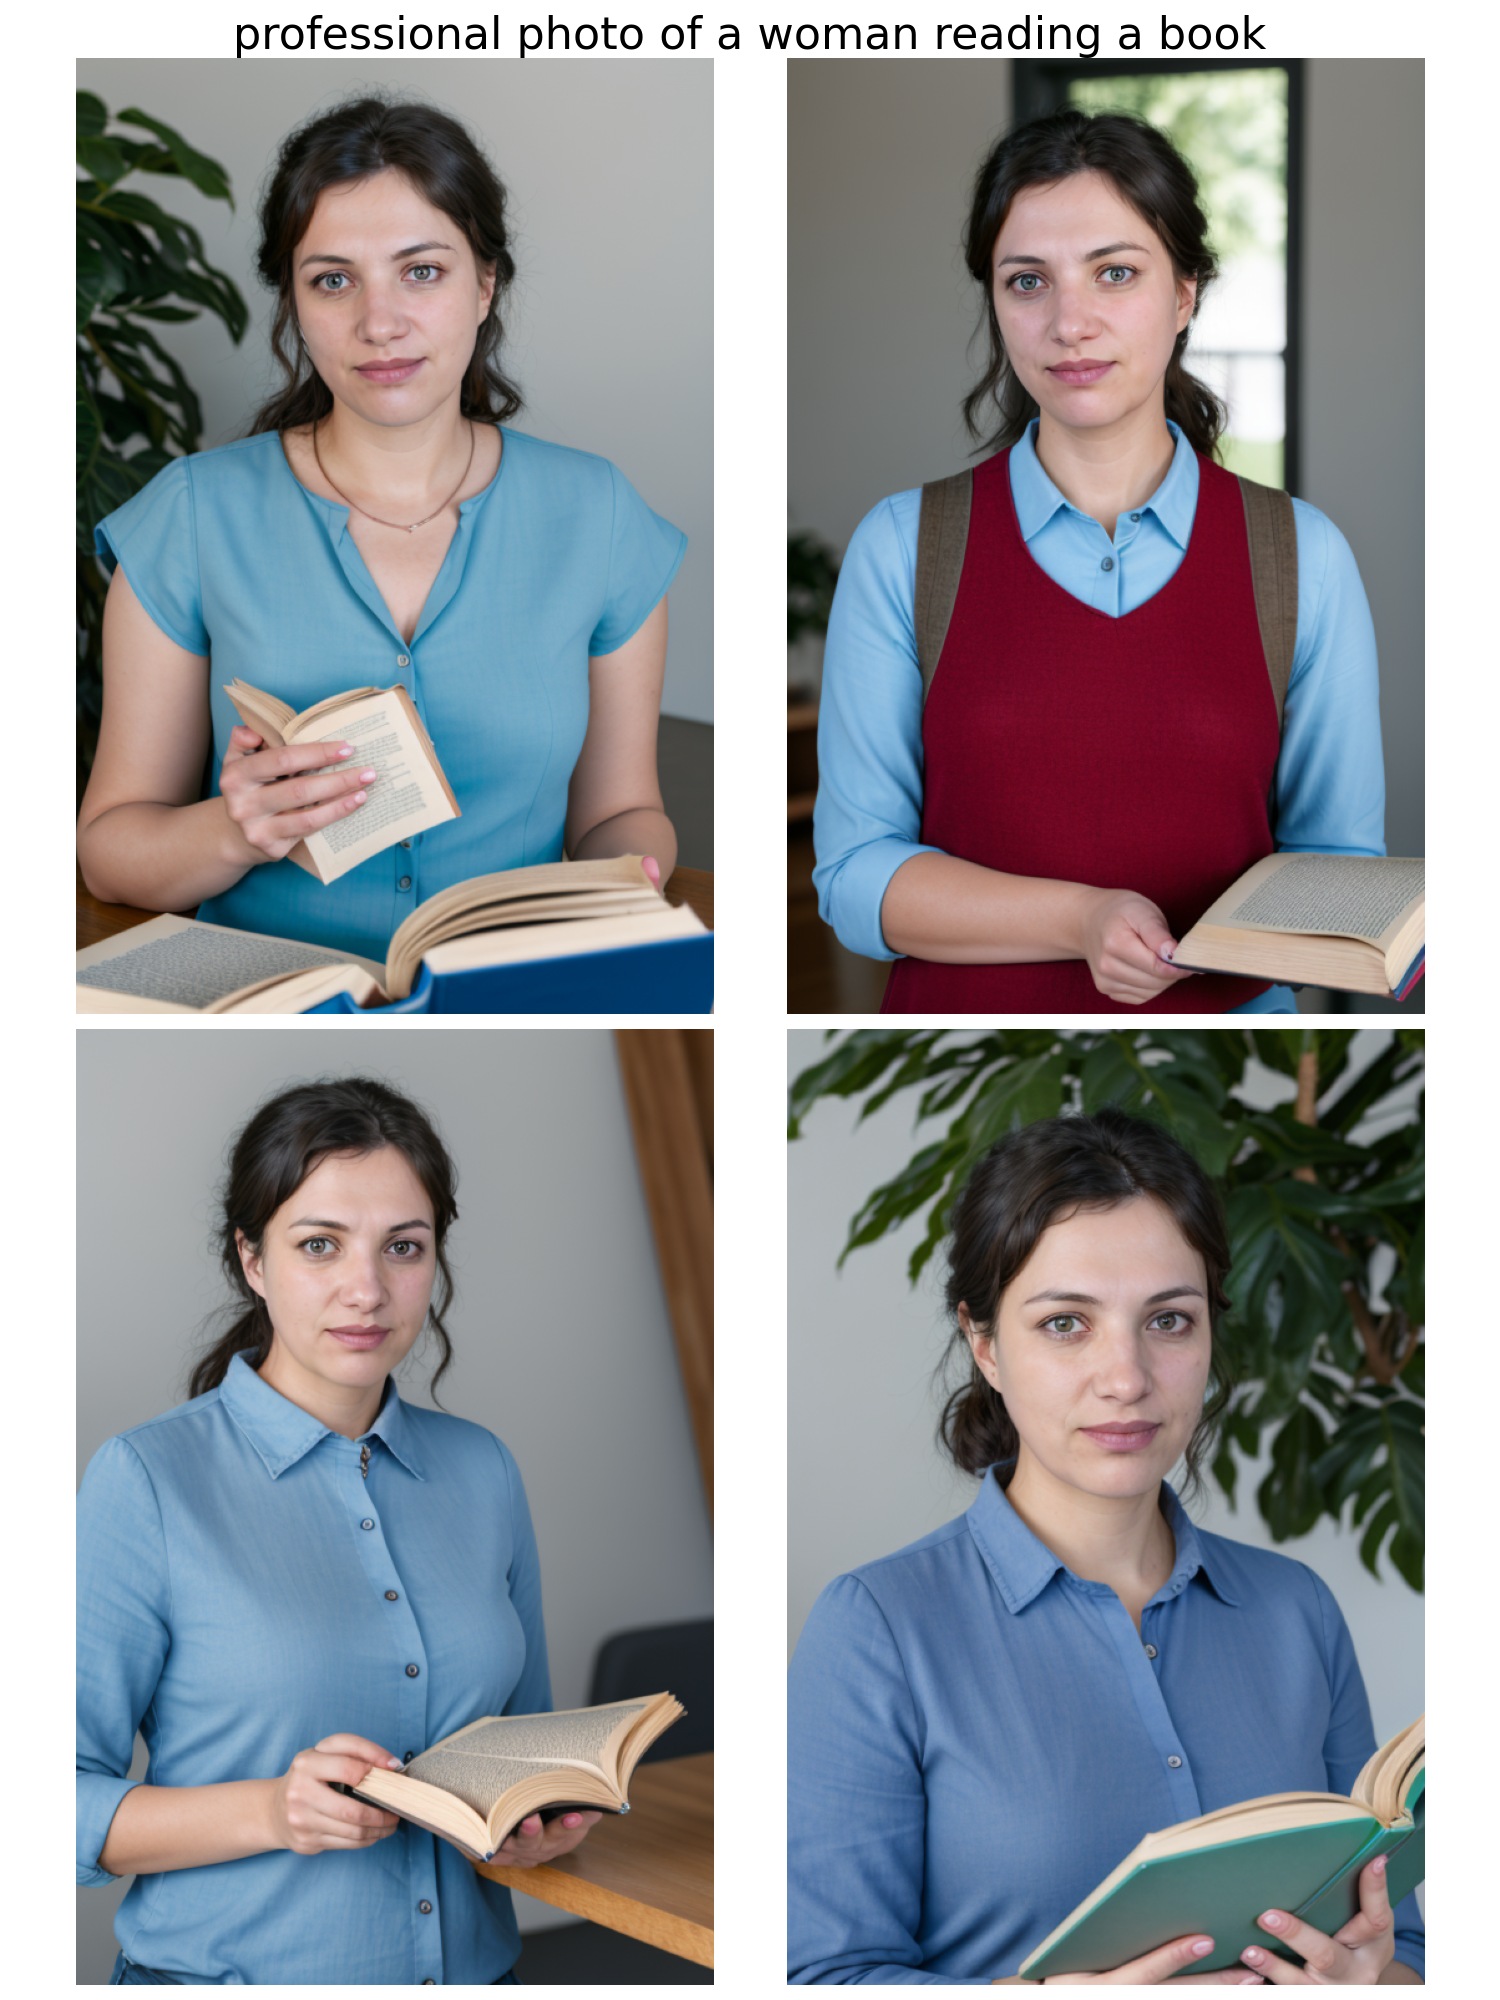
Well, that's it! You can now generate images of a person based on a single image.
Let's try some other prompts:
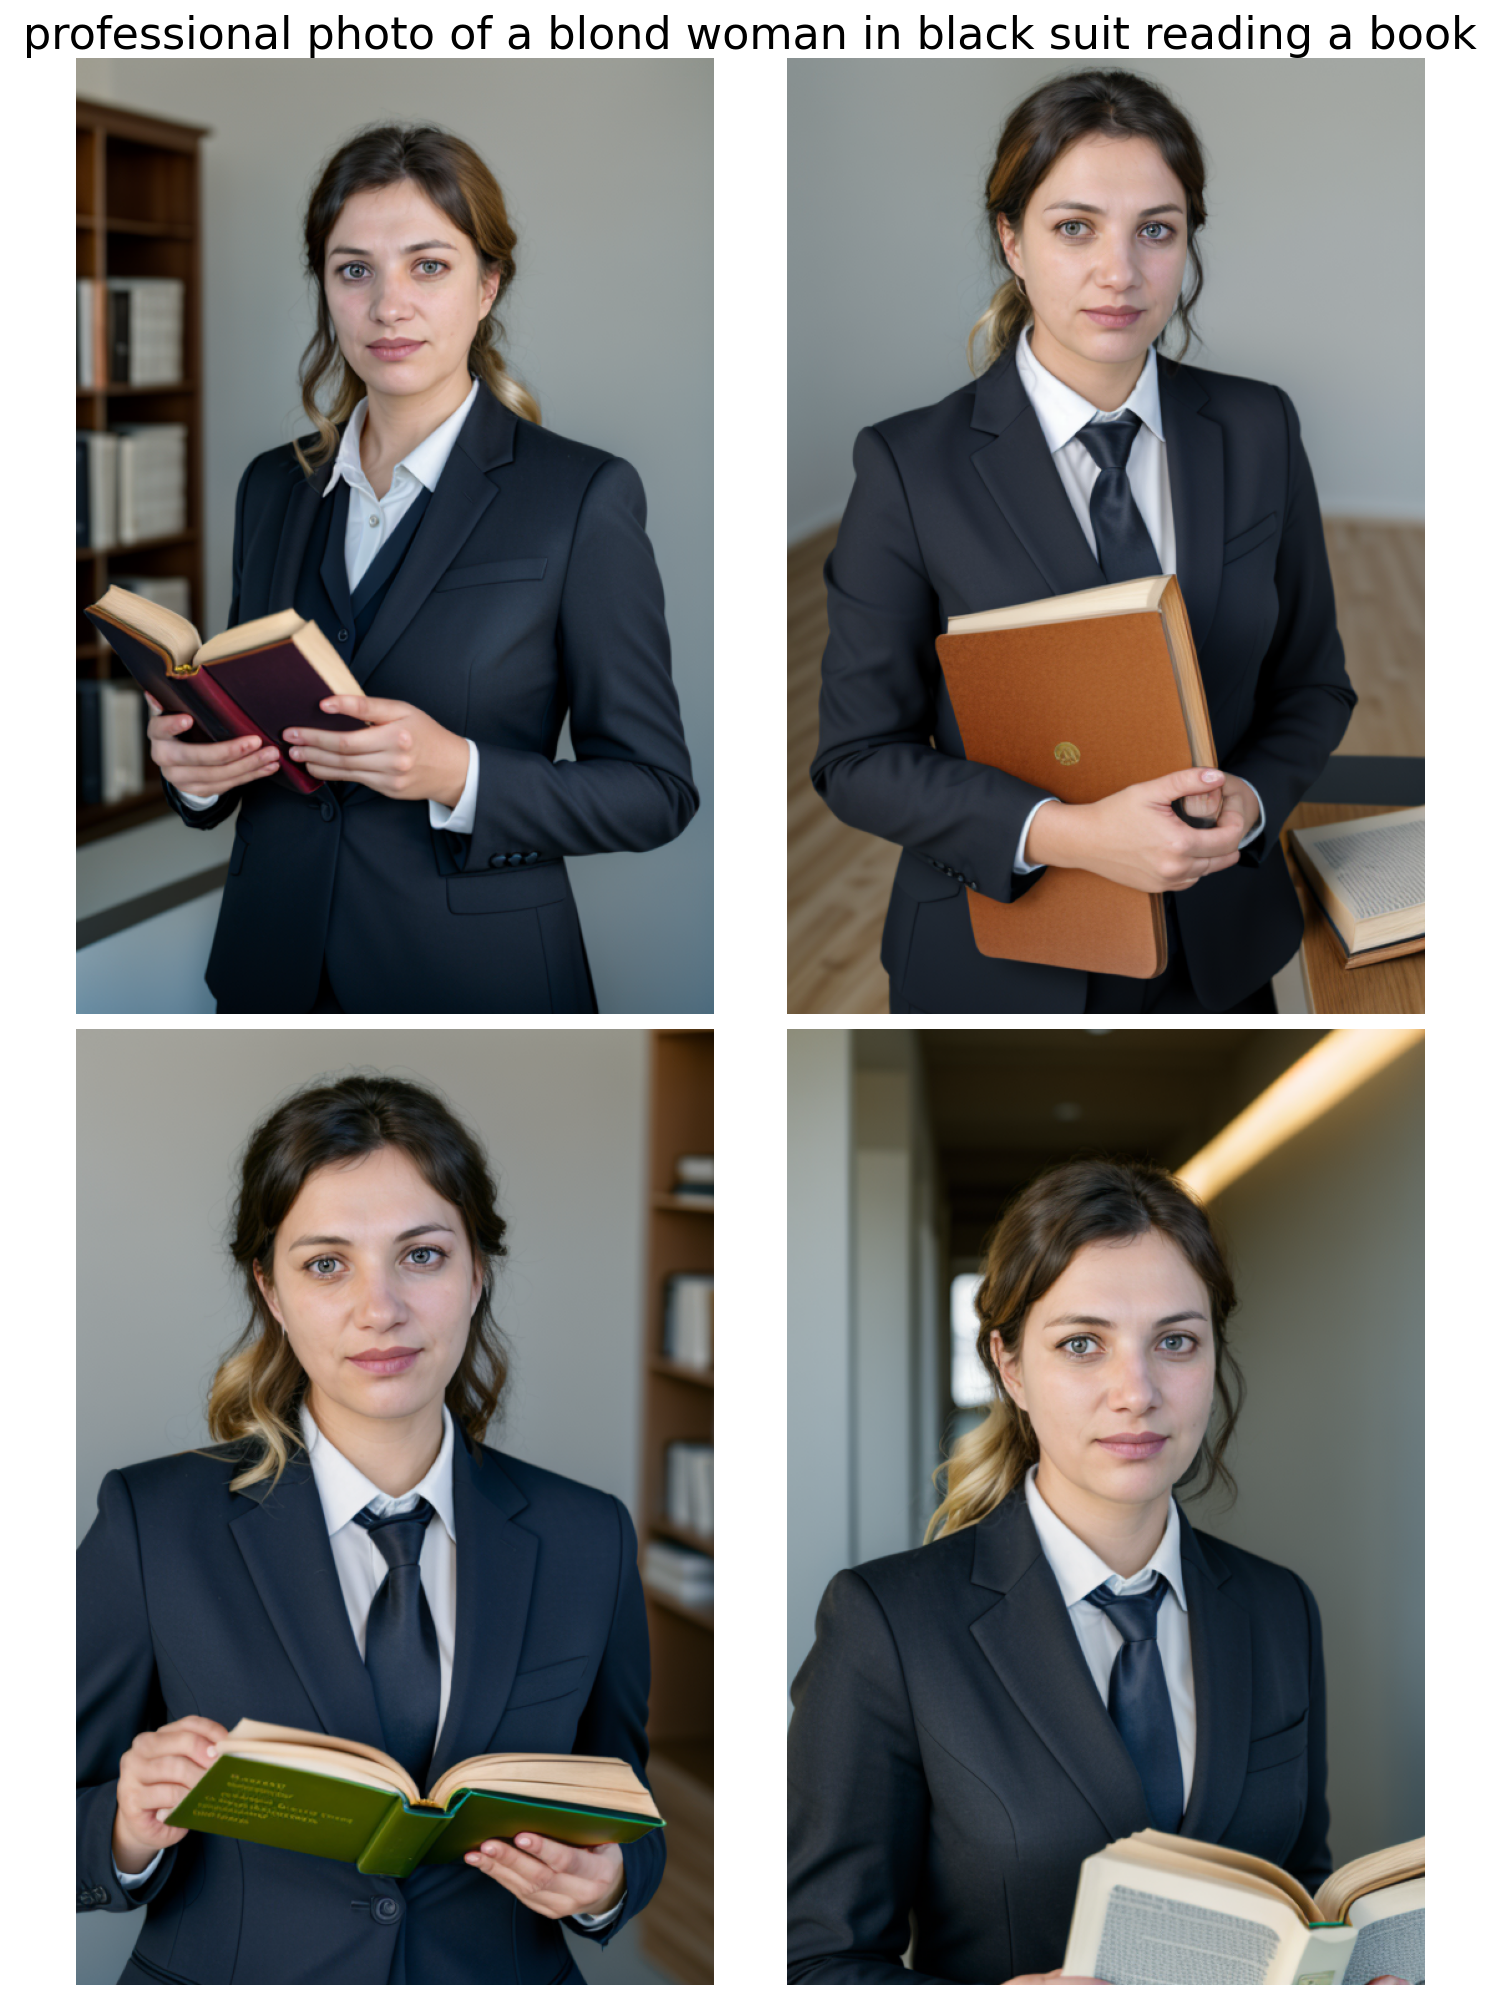
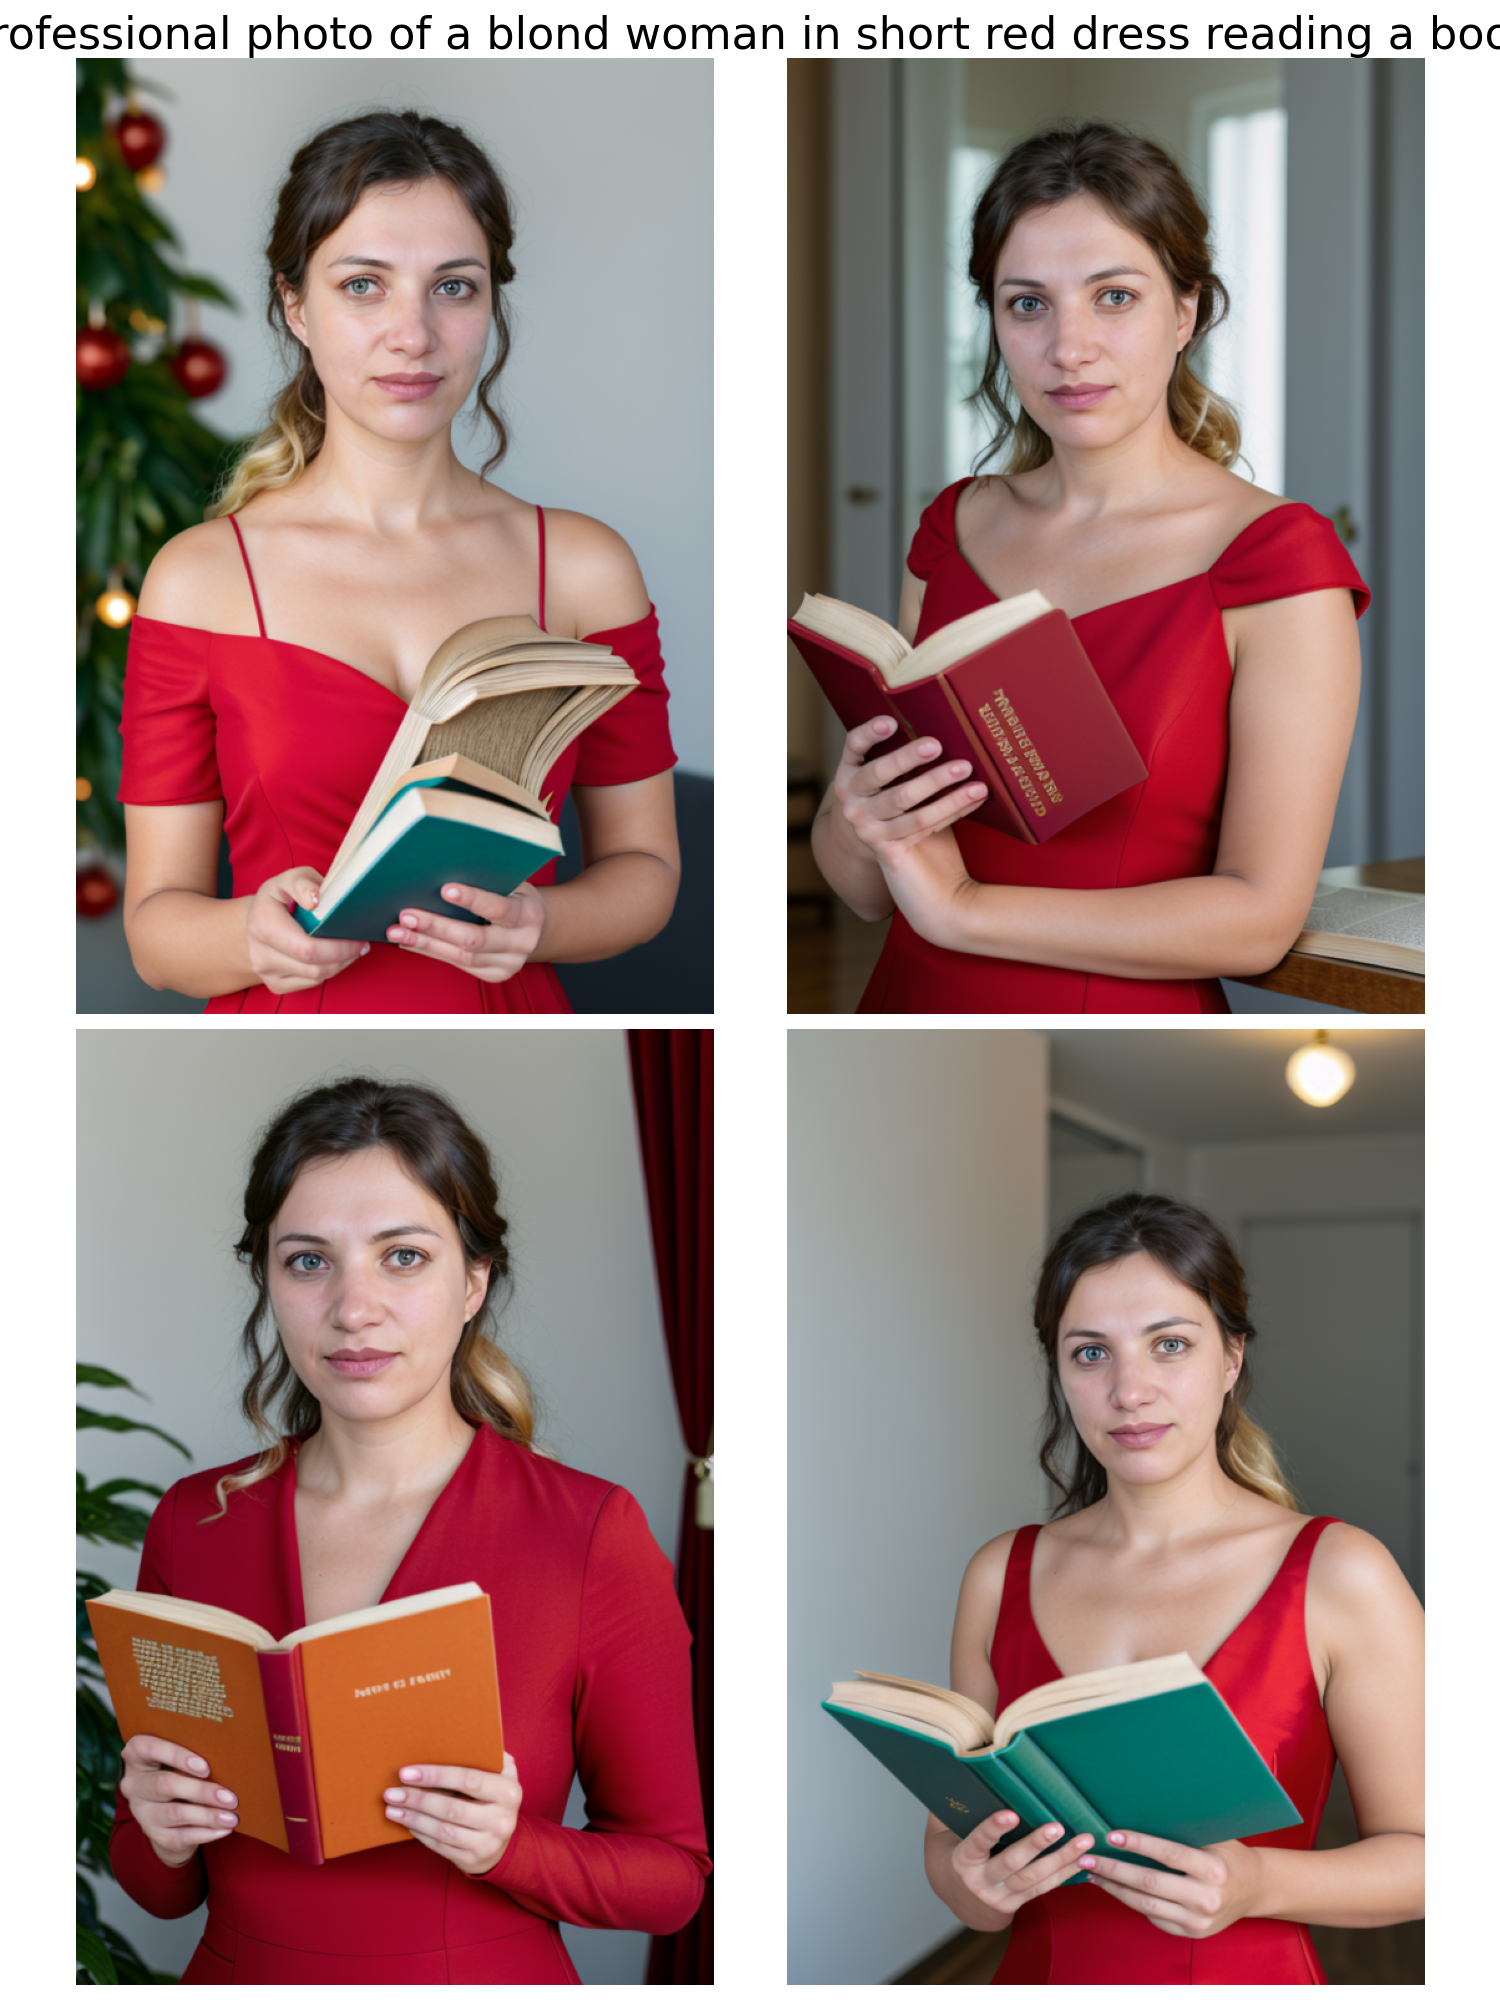
Apart from s_scale and shortcut the remaining parameters are quite self-explanatory.
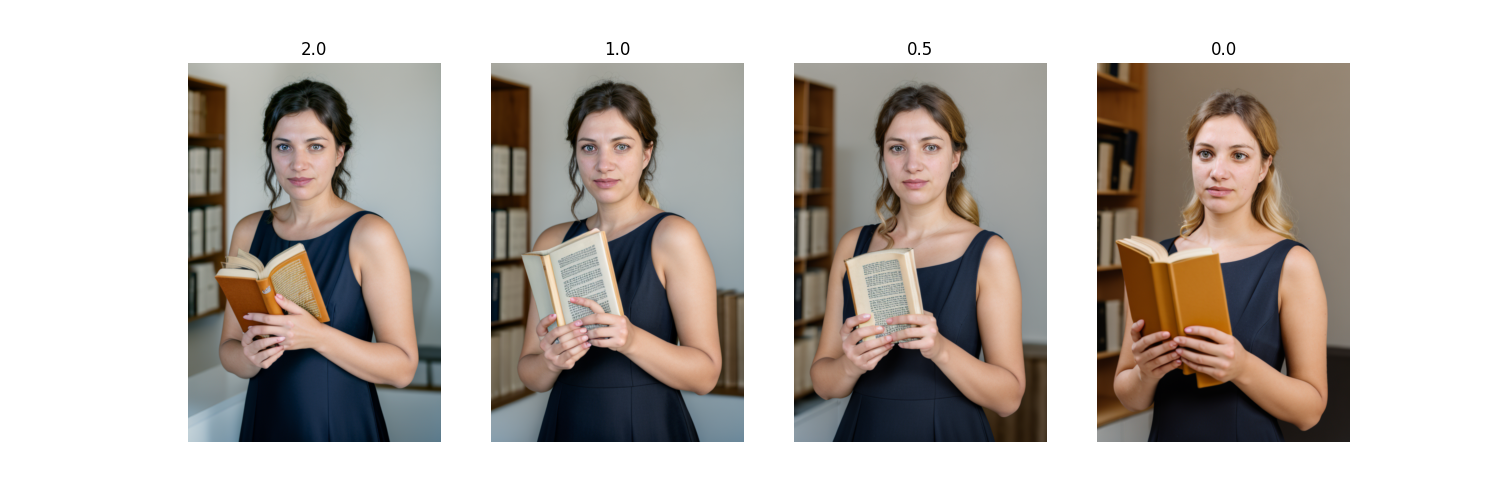
Using s_scale, we can control the amount of similarity the resulting portrait is supposed to have with the original input image.
A value of 2.0 means strong similarity, while a value of 0.0 means very weak similarity.
The resulting face still ensambles the features of the input image, but the face is not necessarily recognizable anymore.
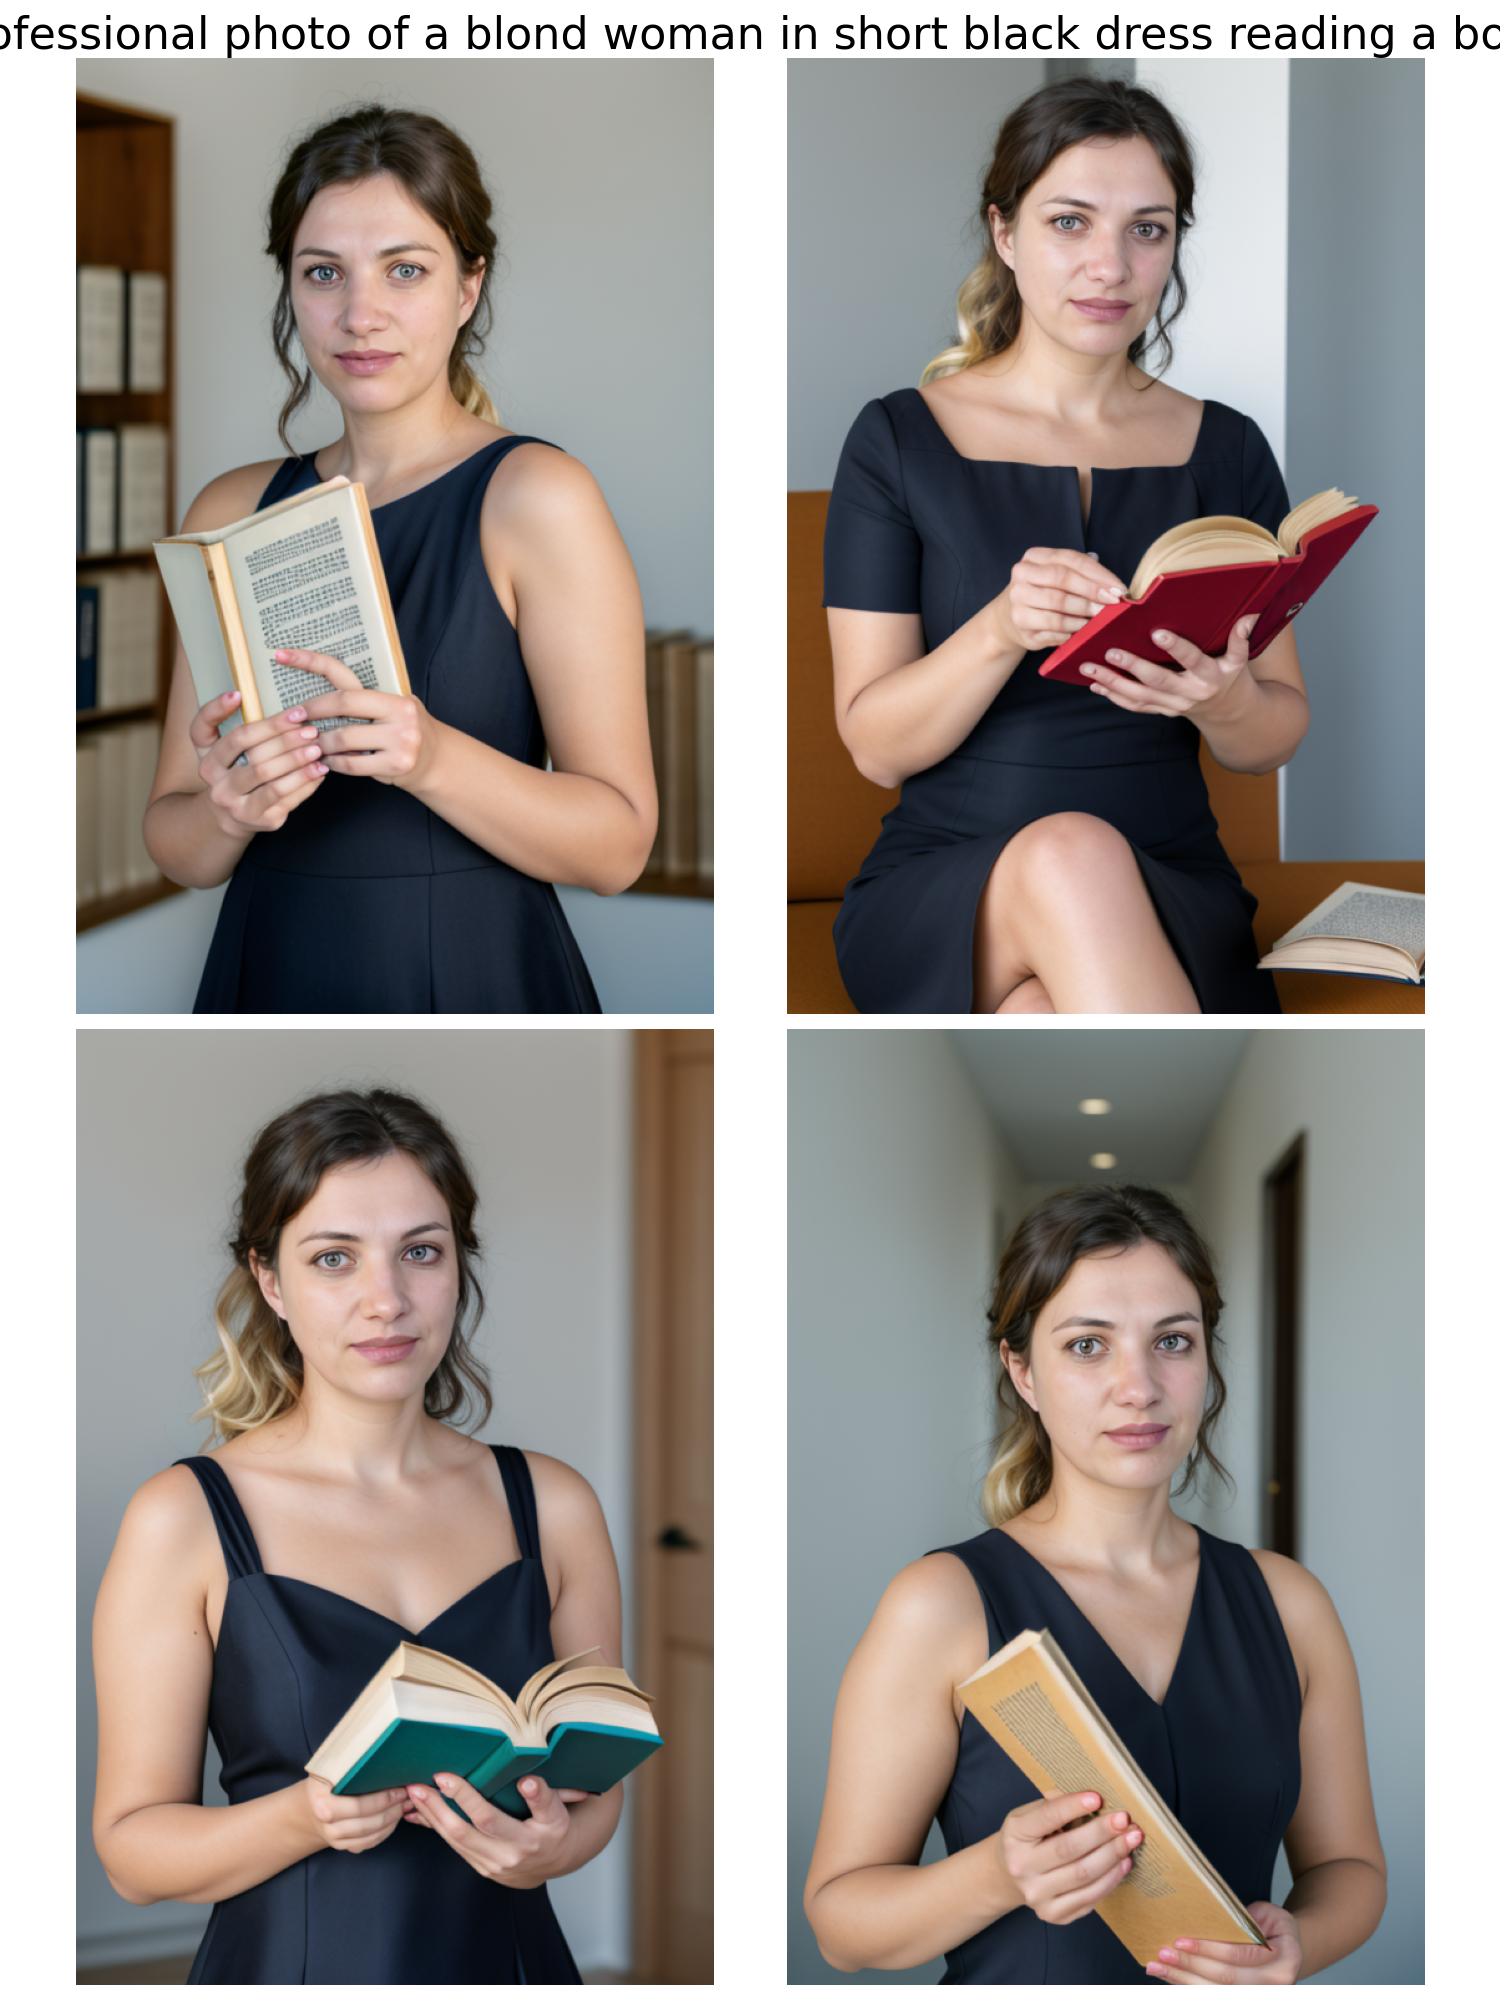
Here's an example for the prompt "professional photo of a blond woman in short black dress reading a book" with different values for s_scale from left to right in descending order.
Sweet, so we have now a bunch of new images of our protagonist. Time to generate some more high class portraits!
Alright, so let's assume we generated 4 images and stored them as 1.png, 2.png, 3.png, 4.png and we have our original image, let's call it 5.jpg in the current directory.
Other than the 1-image technique we used to generate more images of one portrait, we can use multiple images (precisely 5) in a similar way.
import cv2
from insightface.app import FaceAnalysis
import torch

app = FaceAnalysis(name="buffalo_l", providers=['CUDAExecutionProvider', 'CPUExecutionProvider'])
app.prepare(ctx_id=0, det_size=(640, 640))


images = ["1.png", "2.png", "3.png", "4.png", "5.jpg"]

faceid_embeds = []
for img in images:
    image = cv2.imread(img)
    faces = app.get(image)
    faceid_embeds.append(torch.from_numpy(faces[0].normed_embedding).unsqueeze(0).unsqueeze(0))

faceid_embeds = torch.cat(faceid_embeds, dim=1)
The set-up is quite similar, the main difference is that we don't collect the face images anymore, but only their embeddings.
We can then use the exact same pipeline from before
import torch
from diffusers import StableDiffusionPipeline, DDIMScheduler, AutoencoderKL
from PIL import Image
from ip_adapter.ip_adapter_faceid_separate import IPAdapterFaceID
base_model_path = "SG161222/Realistic_Vision_V4.0_noVAE"
vae_model_path = "stabilityai/sd-vae-ft-mse"
ip_ckpt = "ip-adapter-faceid-portrait_sd15.bin"
device = "cuda"
noise_scheduler = DDIMScheduler(
num_train_timesteps=1000,
beta_start=0.00085,
beta_end=0.012,
beta_schedule="scaled_linear",
clip_sample=False,
set_alpha_to_one=False,
steps_offset=1,
)
vae = AutoencoderKL.from_pretrained(vae_model_path).to(dtype=torch.float16)
pipe = StableDiffusionPipeline.from_pretrained(
base_model_path,
torch_dtype=torch.float16,
scheduler=noise_scheduler,
vae=vae,
feature_extractor=None,
safety_checker=None
)
# load ip-adapter
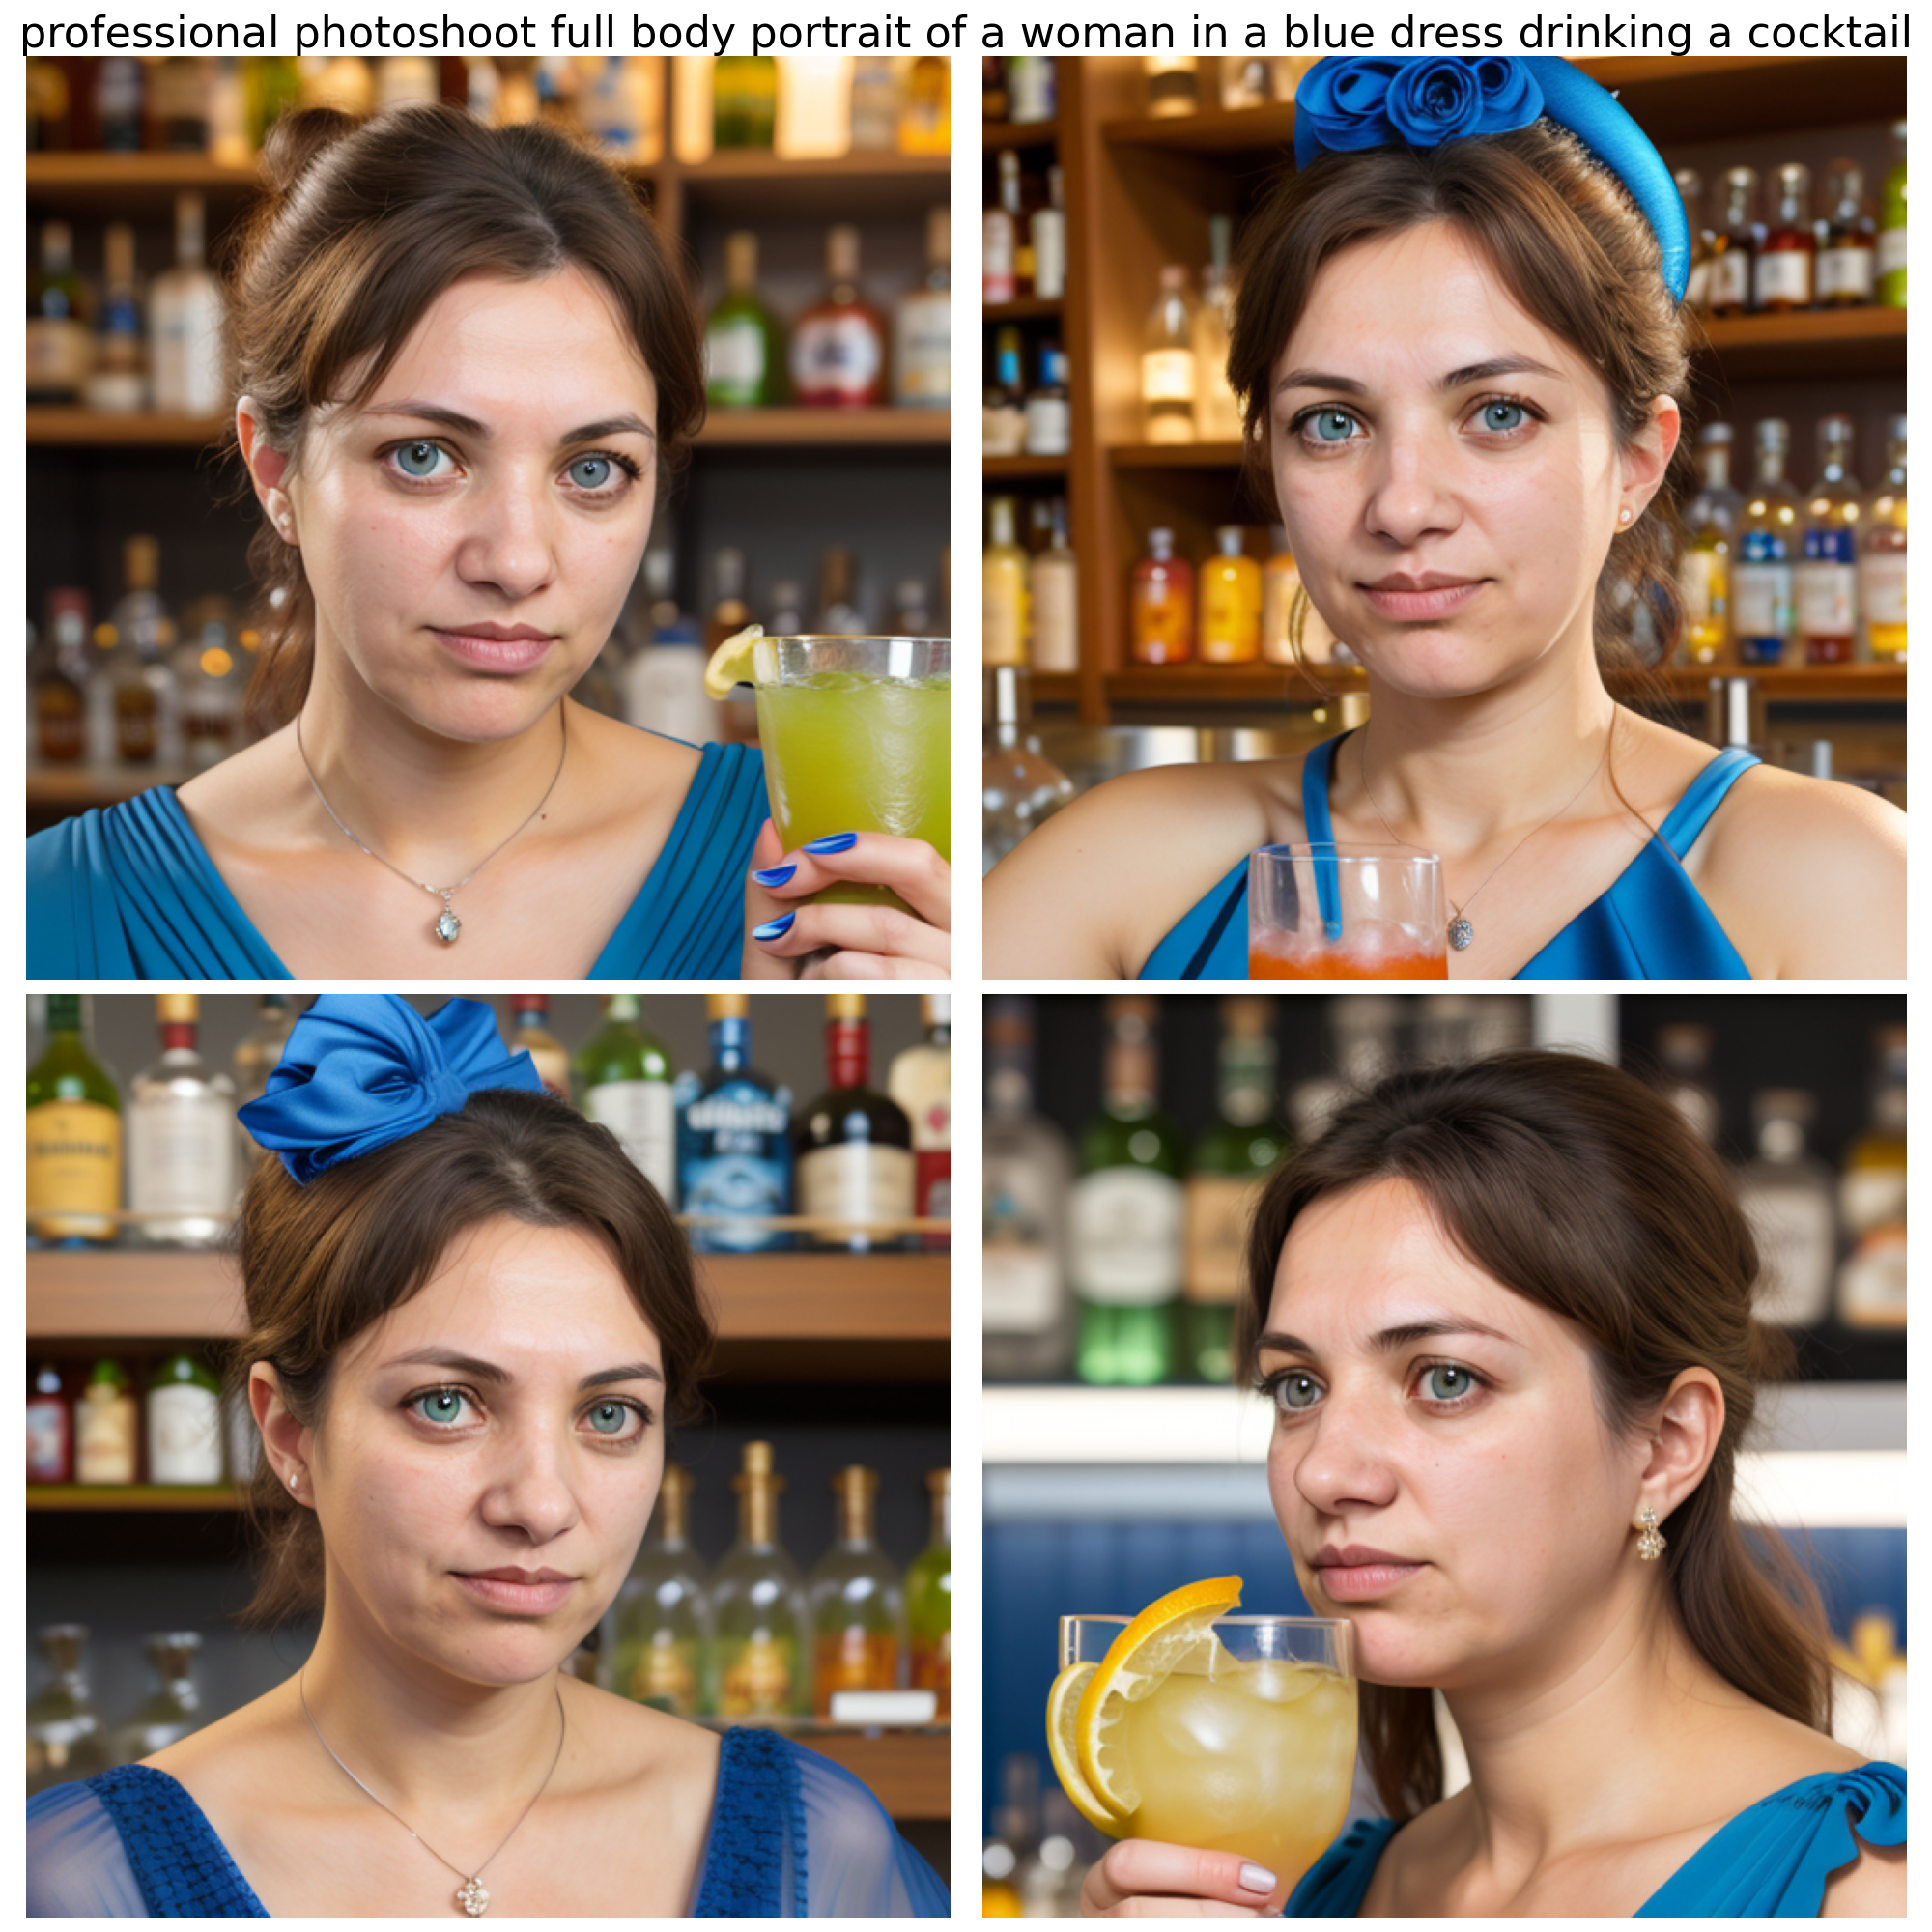
ip_model = IPAdapterFaceID(pipe, ip_ckpt, device, num_tokens=16, n_cond=5)to prompt the model and generate new portraits
# generate image
prompt = "professional photoshoot full body portrait of a woman in a blue dress drinking a cocktail"
negative_prompt = "monochrome, lowres, bad anatomy, worst quality, low quality, blurry"

images = ip_model.generate(
    prompt=prompt,
    negative_prompt=negative_prompt,
    faceid_embeds=faceid_embeds,
    num_samples=4,
    width=512,
    height=512,
    num_inference_steps=30,
    seed=2023
)
And voilà, we have new images of our protagonist, quite similar to the ones of Margot Robbie earlier.
This looks quite promising, doesn't it?
Especially the fact that you can change things so easily, for instance let's make her smile instead being so serious using the prompt professional photoshoot full body portrait of a woman in a blue dress drinking a cocktail, smiling into the camera
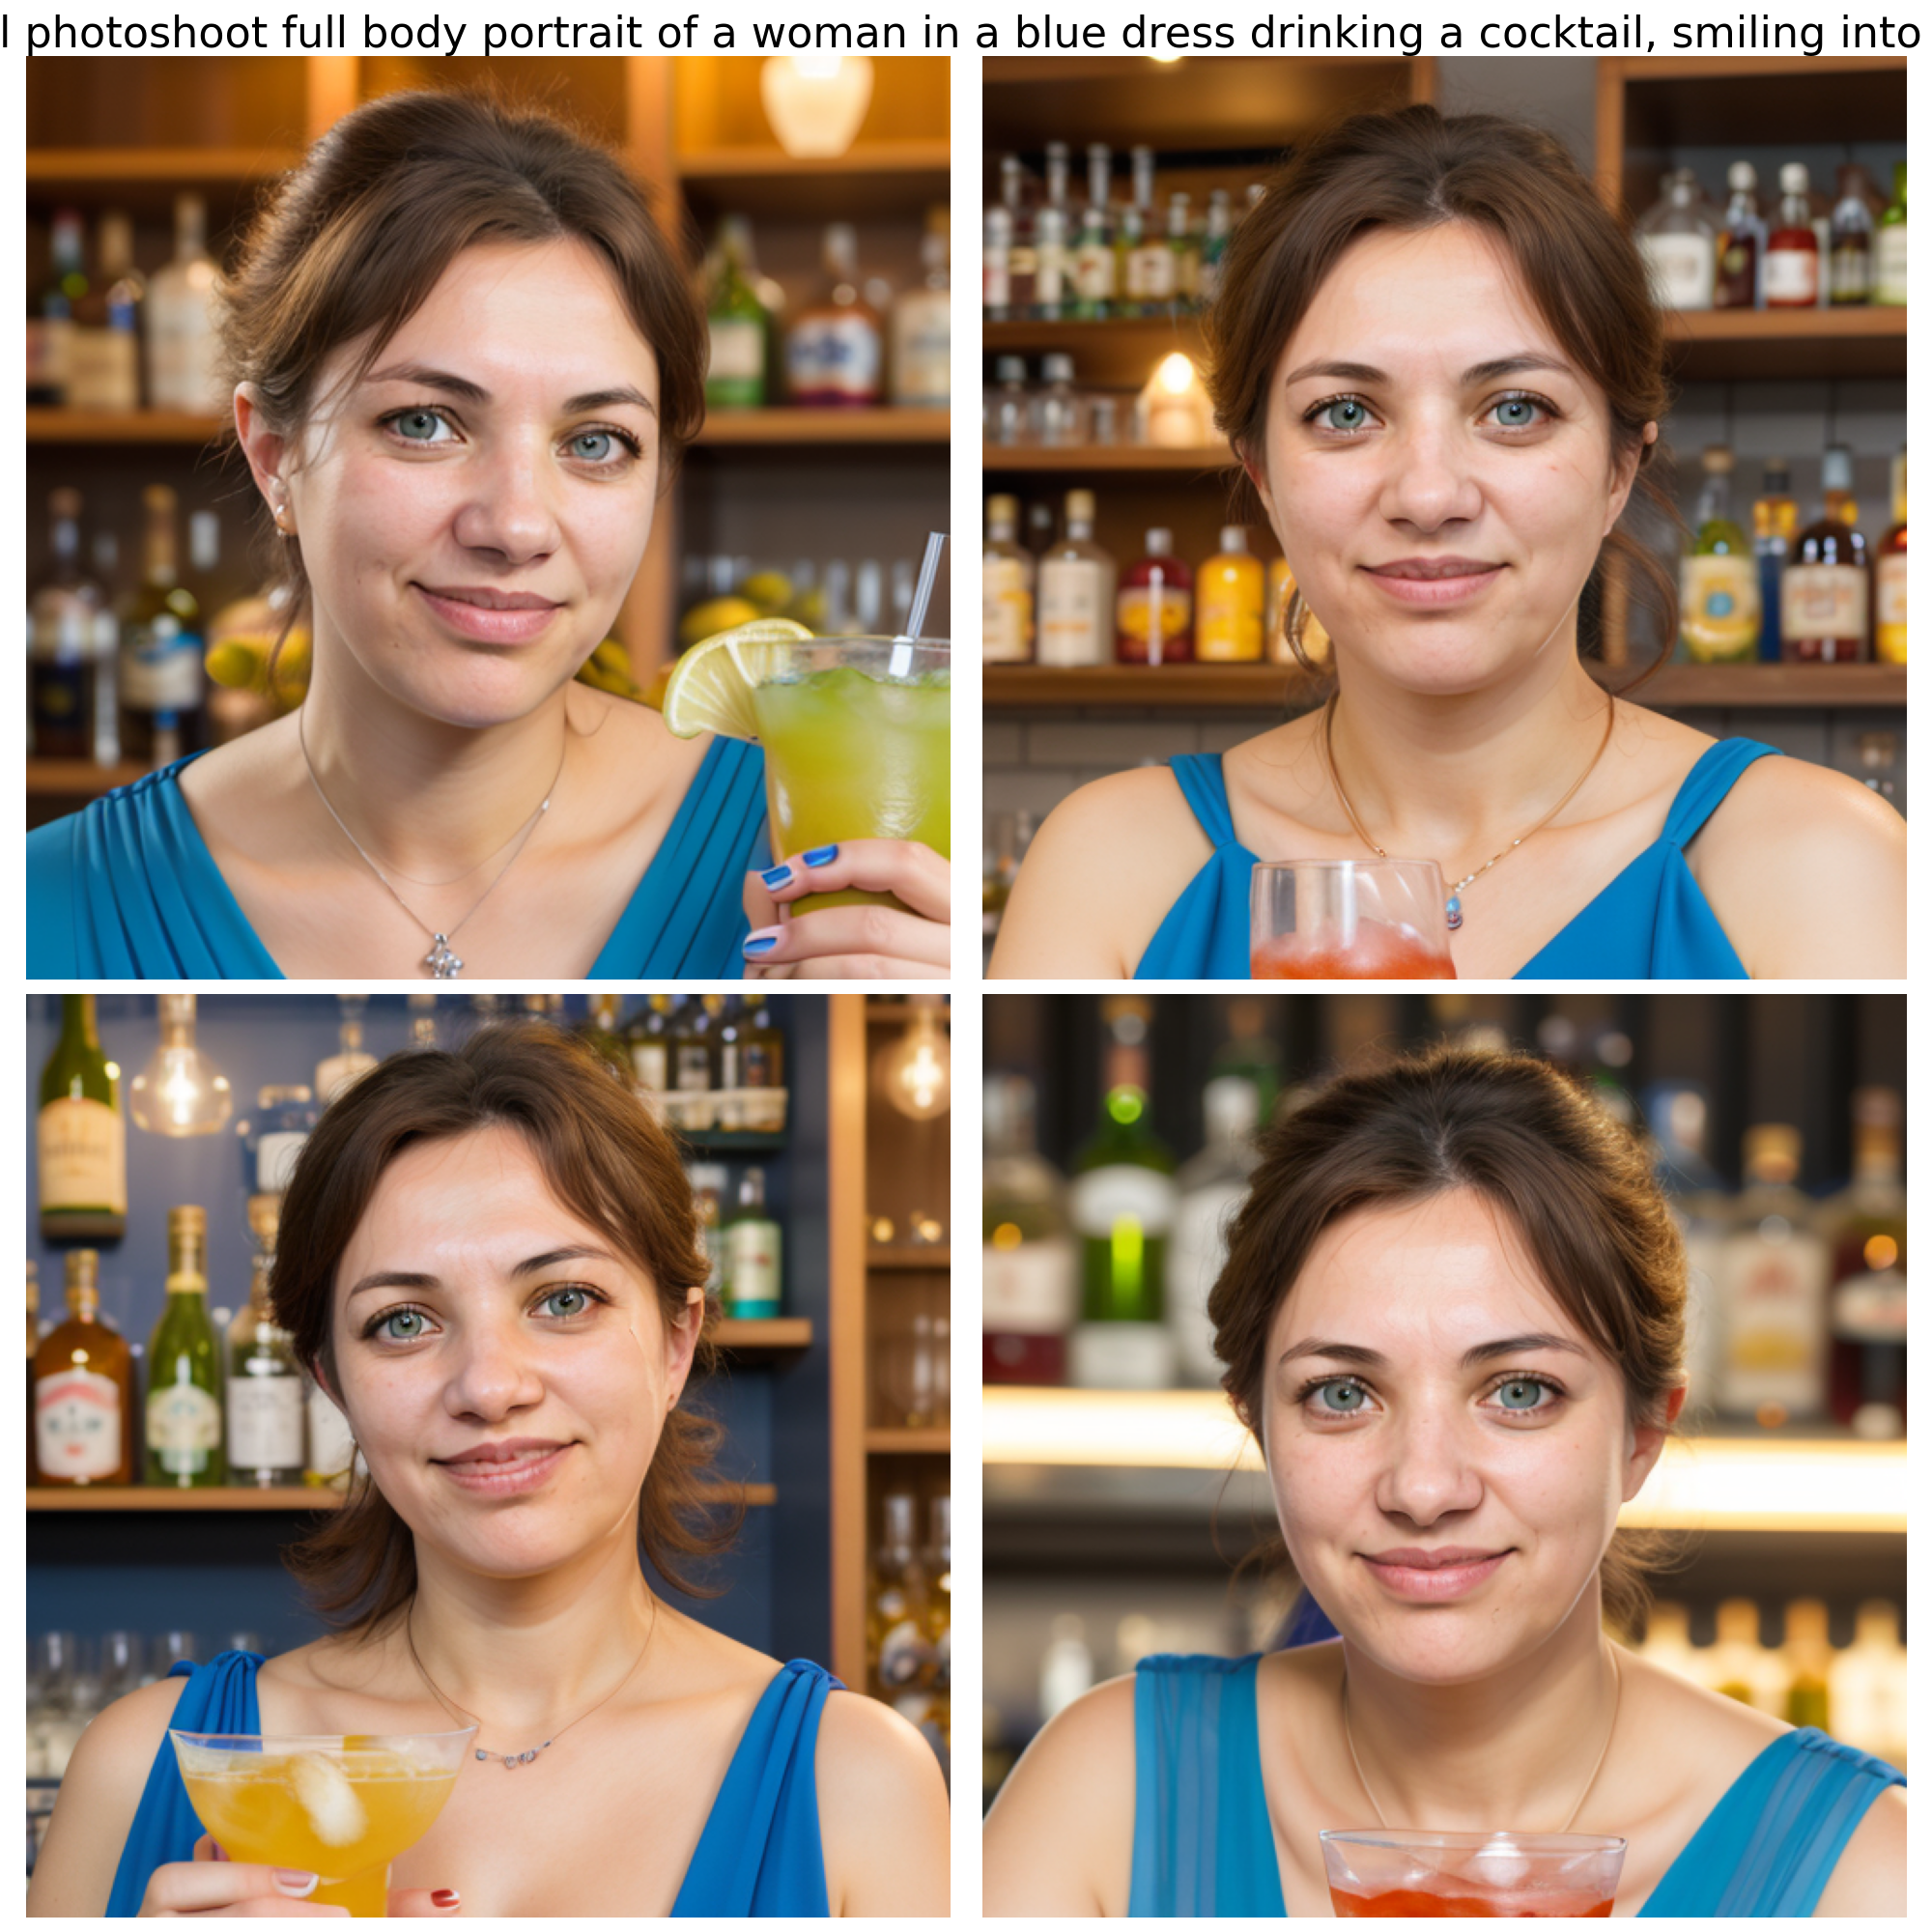
Overall, I'm quite impressed by the capabilities of this model. It's quite easy to use and the results are quite good. And one of the best arguments about this is the speed. In general it takes around 8 to 10 seconds to generate 4 samples, and the inference speed doesn't seem to decrease linear. So generating multiple images at once feels right.
Drawbacks
One of the major drawbacks of this model is the fact that it is not possible to generate images of things other than a person.
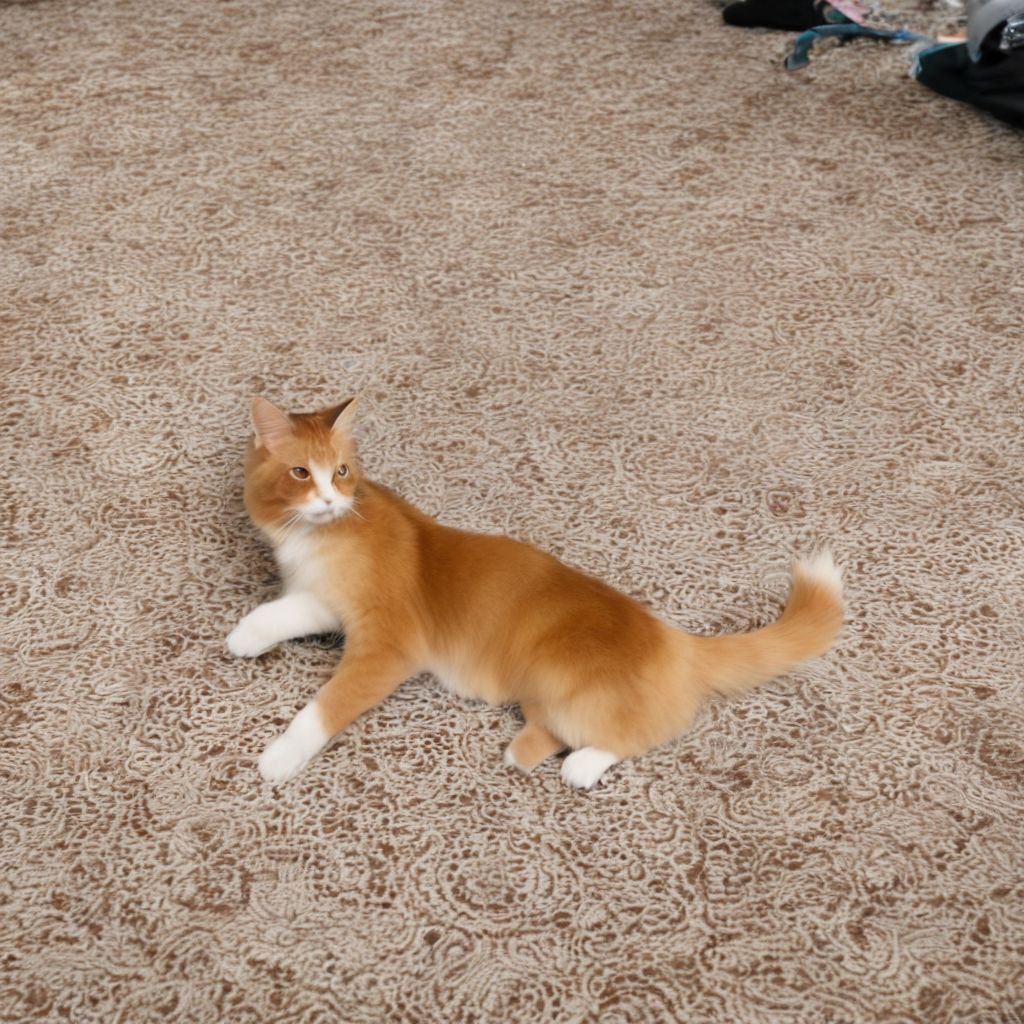
I've tried to generate images of my cat, but I wasn't able to extract the features of the cat's face.
Apart from this, due to the nature of the IP-Adapter library I wasn't able to run SDXL in this experiment.
Most of the time I'm using DiffusionPipeline when running SDXL. And I can only do that on my limited hardware using DiffusionModel.snable_model_cpu_offload().
Unfortunately, IP-Adapter doesn't support this and throws errors because some embeddings are on different devices.
Now one way to fix this is to implement this feature upstream and post a PR to the repository. Let's see...
The project page of IP-Adapter hints for more applications, such as structural controls. This topic is something that I will look soon into, especially when exploring ControlNet as hinted earlier.
Conclusion
I guess I have my solution for portrait generation now. If once we're able to use other models than SD 1.5, this will be an even bigger game changer.
But apart from this, I'm quite happy with the results and the ease of use of this pipeline.
Update
I couldn't hold myself and needed to look further into IP-Adapter.
Here's a small look into more applications.
Variations without prompt

Variations with prompt
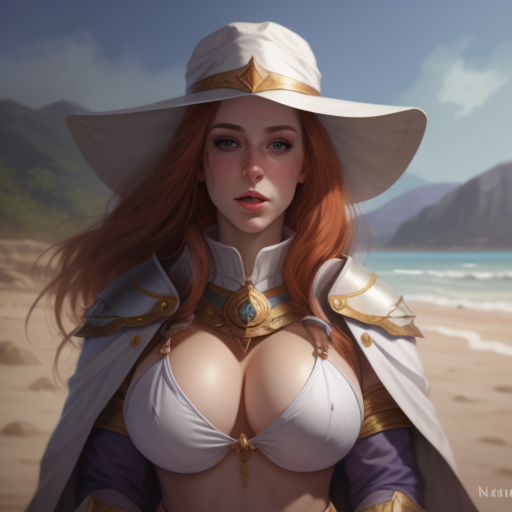
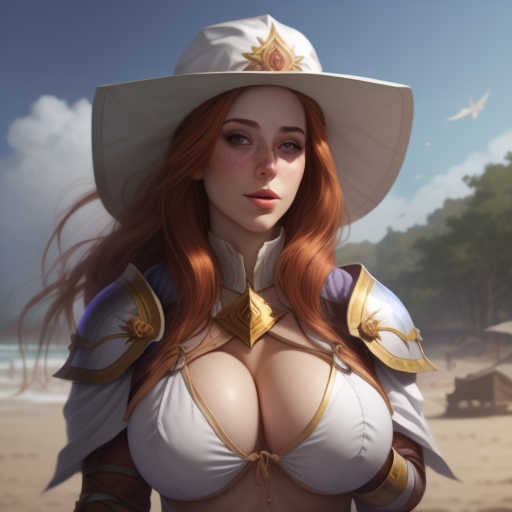
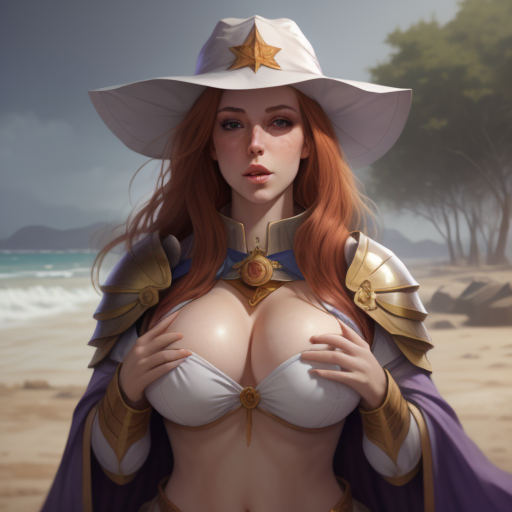
For my wifu lovers, here's a small treat
Prompt: "best quality, high quality, ahegao, big breasts, too small bikini, wearing a hat on the beach"

Again, I couldn't stop myself and wanted to explore more.
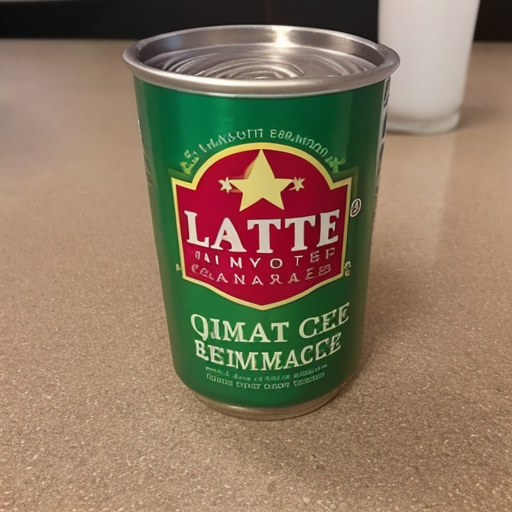
Is it possible to generate images of other things, apart from people?
For instance, let's say I have this product, a soda can, and I want to generate images of it in different situations.
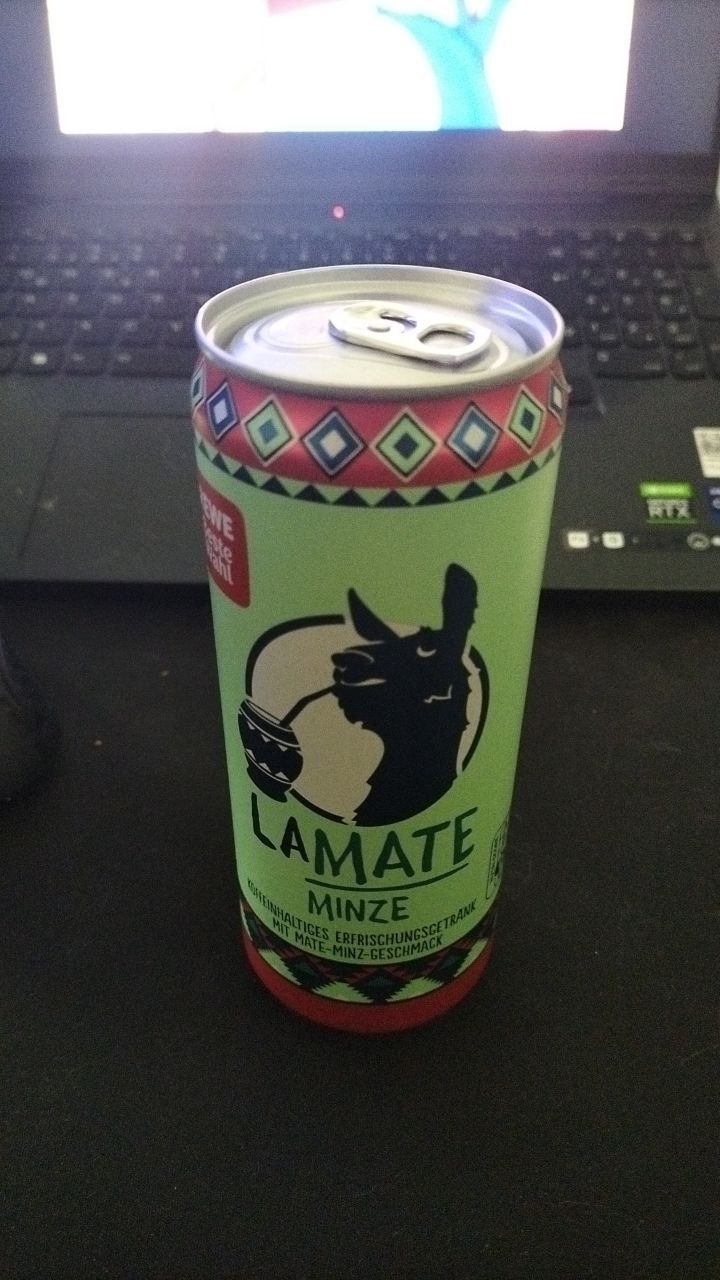
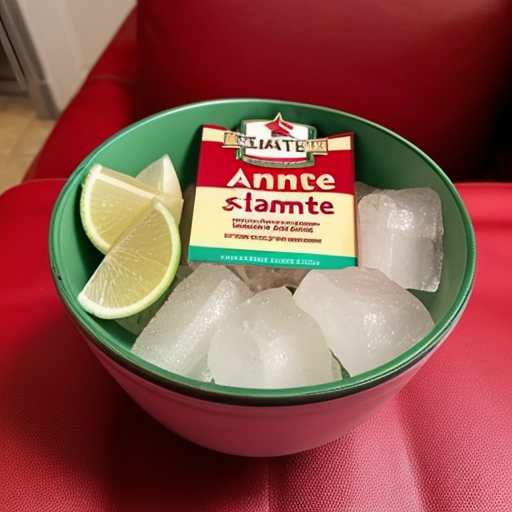
Running the same pipeline as before to generate variations of the input image, yields the following results.
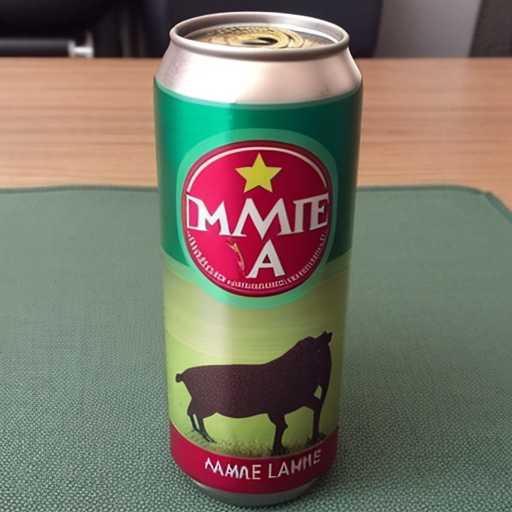
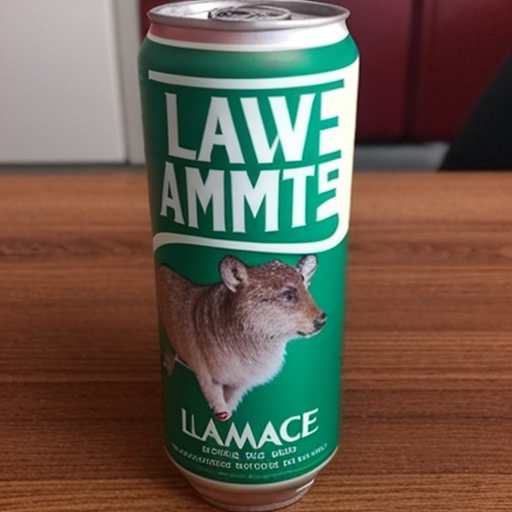
As you can see we get a bunch of cans on tables, similar to the input image.
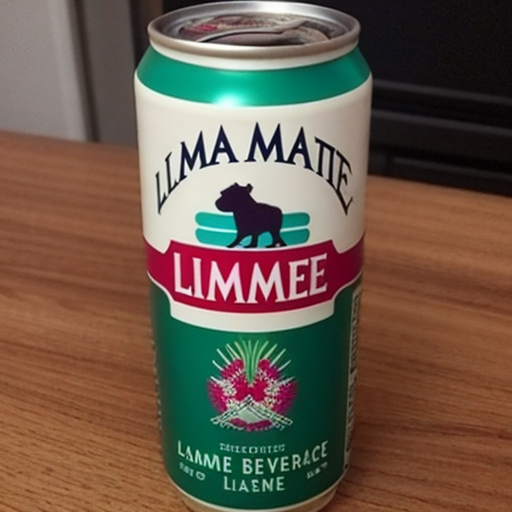
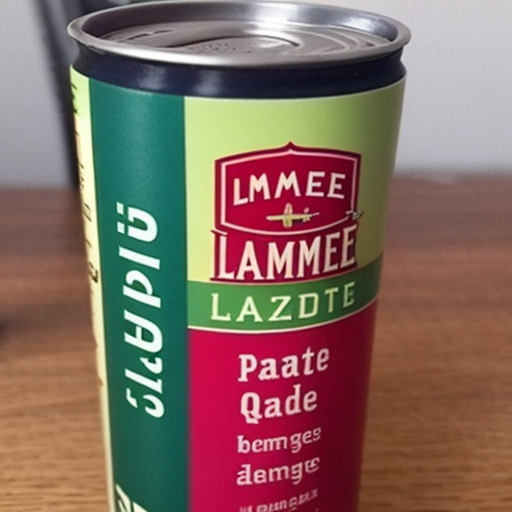
What happens if we throw in a prompt?
Using prompt: "best quality, high quality, in a bowl of ice"
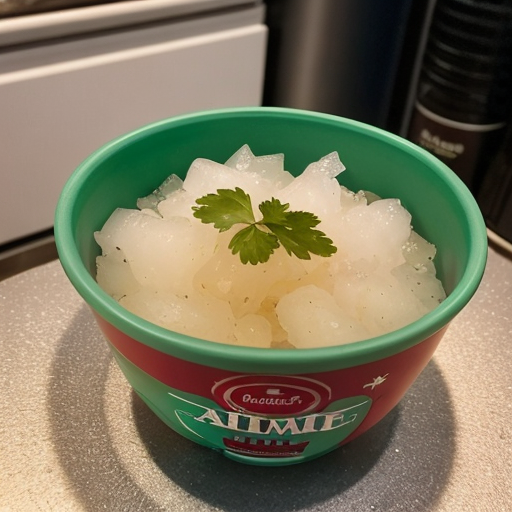
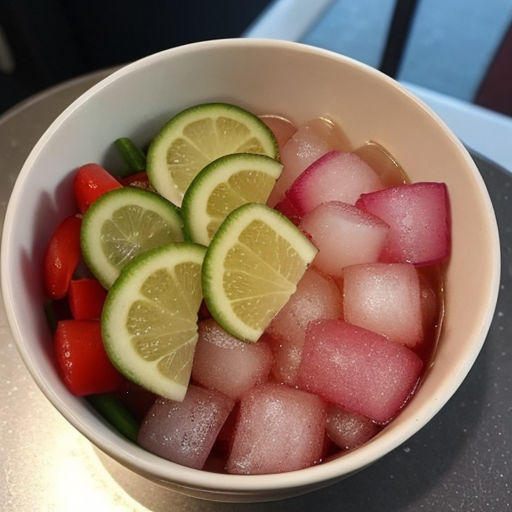
Hmpf, that's pretty bad. But I guess that's not the model's fault, but rather the fact that the model is not trained on such data and it's more intended to resemble human faces and poses, not all sorts of items.
You can find a setup for this experiment in the official IP-Adapter repository.